Your Guide to the Most Common Types of Concrete

Your Guide to the Most Common Types of Concrete

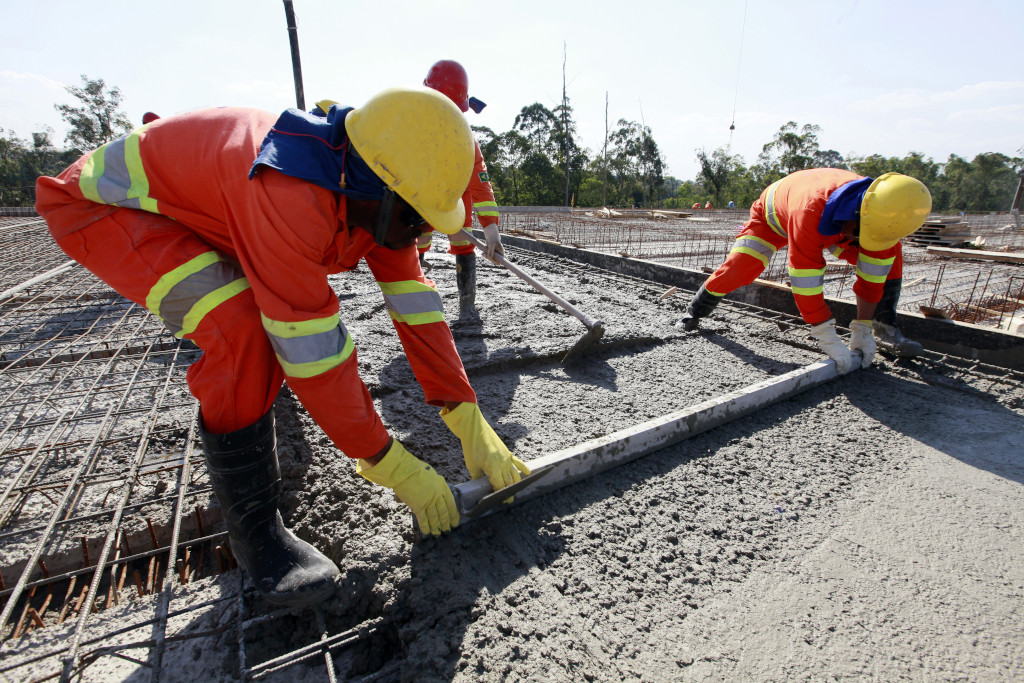
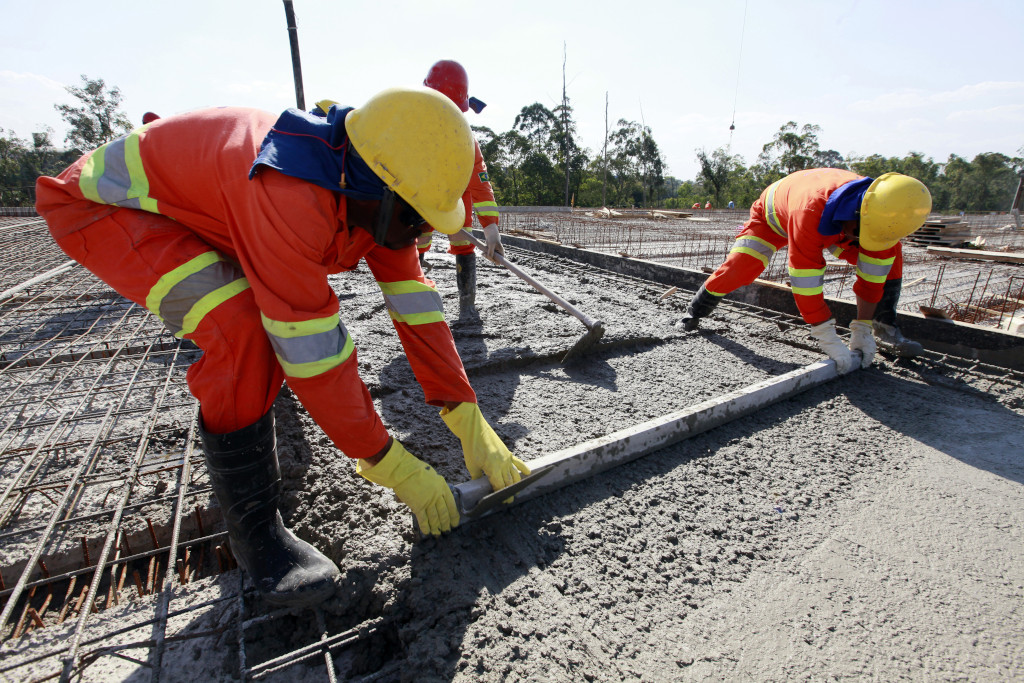
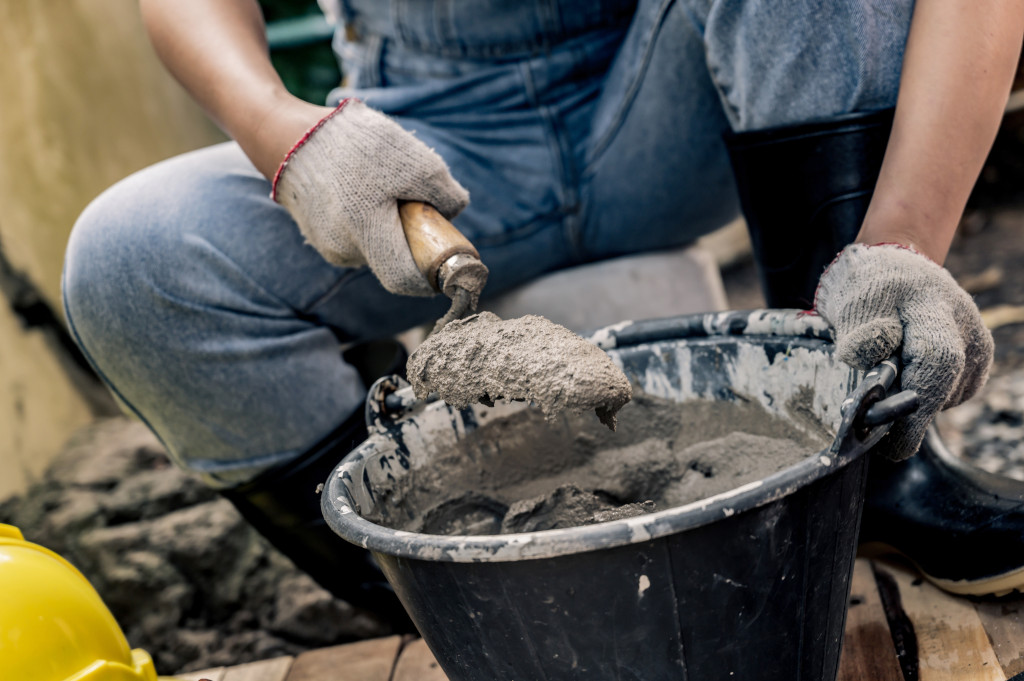
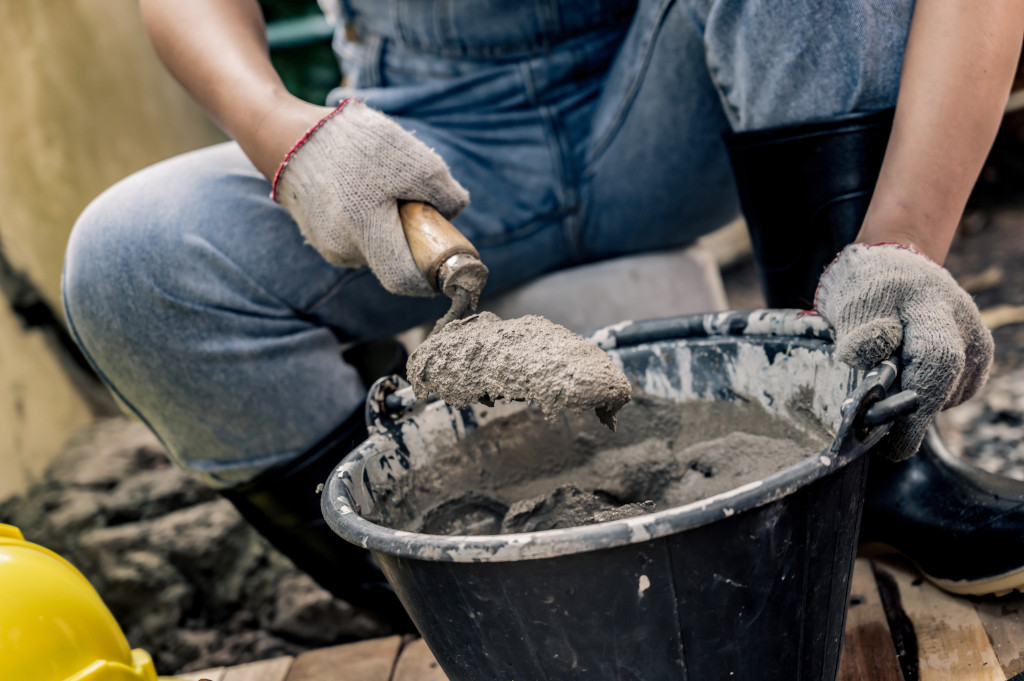
Concrete is an integral part of the modern world. It’s used to build everything from sidewalks and driveways to skyscrapers and dams, but many people are unaware of just how many options are available. 

There are endless types of concrete, each with unique properties that make them ideal for certain applications. This article will introduce you to the most common types so you can decide which will best suit your needs.

1. Lightweight concrete

Lightweight concrete is made up of water, polystyrene particles, cement, and other additives. It’s lighter than regular concrete and is used for applications that require the least amount of weight possible, such as roofing and flooring.

Lightweight concrete also has better insulation properties and a lower density than regular concrete, making it ideal for use in climates where heating and cooling costs are a drain on the wallet. Proper installation is essential to ensure that lightweight concrete performs as expected. Be sure you choose a contractor with extensive experience using this type of concrete.

2. Reinforced concrete

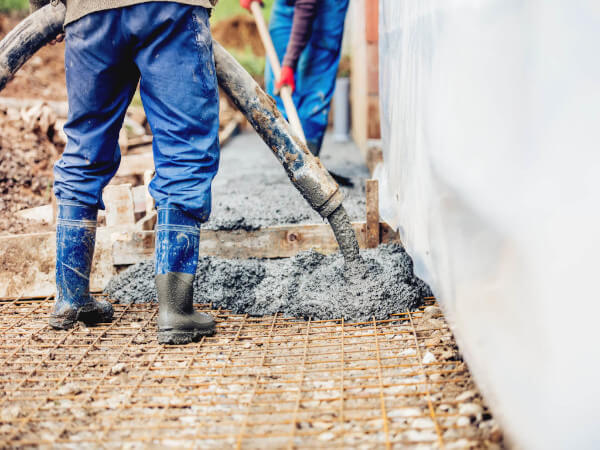
Reinforced concrete is made with steel rebar or mesh that’s embedded in the wet concrete. It’s much stronger than regular concrete and can withstand greater loads without breaking.

Reinforced concrete is used for heavy-duty applications such as bridges, parking garages, and skyscrapers, and is common in both residential and commercial foundations and slabs. While it is more expensive than regular concrete, it’s also stronger and longer-lasting. 

There are two types of reinforcement: steel rebar or a fiber mesh. While both offer strength benefits over standard concrete, steel offers slightly more strength, but fiber mesh is less expensive and easier to install.

3. Polished concrete

Polished concrete is a type of flooring that’s made from regular concrete. It can be used in both residential and commercial applications and is becoming increasingly popular due to its aesthetic appeal and durability.

This type of concrete offers a shiny and smooth surface that’s ideal for offices, stores, restaurants, healthcare facilities, schools, and more.

Concrete polishing is something that should only be done by professionals because improper installation can damage the surface of your polished flooring. If done incorrectly, polishing can also void the warranty on your flooring.

4. Mass concrete

Mass concrete is poured into ready-made molds. It’s a type of precast concrete made from regular or lightweight aggregate. It’s commonly used to create dams and large foundation slabs.

Mass concrete is similar to standard concrete with just one main difference: mass aggregates are larger than standard aggregates. This makes the concrete less dense, which can be a good or bad thing depending on your needs.

5. Prestressed concrete

Prestressed concrete is made with steel cables that are stretched prior to installation using hydraulic jacks, which creates tension on the beams as they set. This compression adds strength to the concrete and minimizes cracking but also makes it more expensive.

6. Precast concrete

Precast concrete is molded in a factory setting, which allows for more precise measurements and a higher level of quality control. Because it’s cured under controlled conditions, a stronger product is yielded that is less likely to crack. It’s also easier to install than standard concrete, helping you ensure quality and efficiency and avoid installation issues. 

7. Ready mix concrete

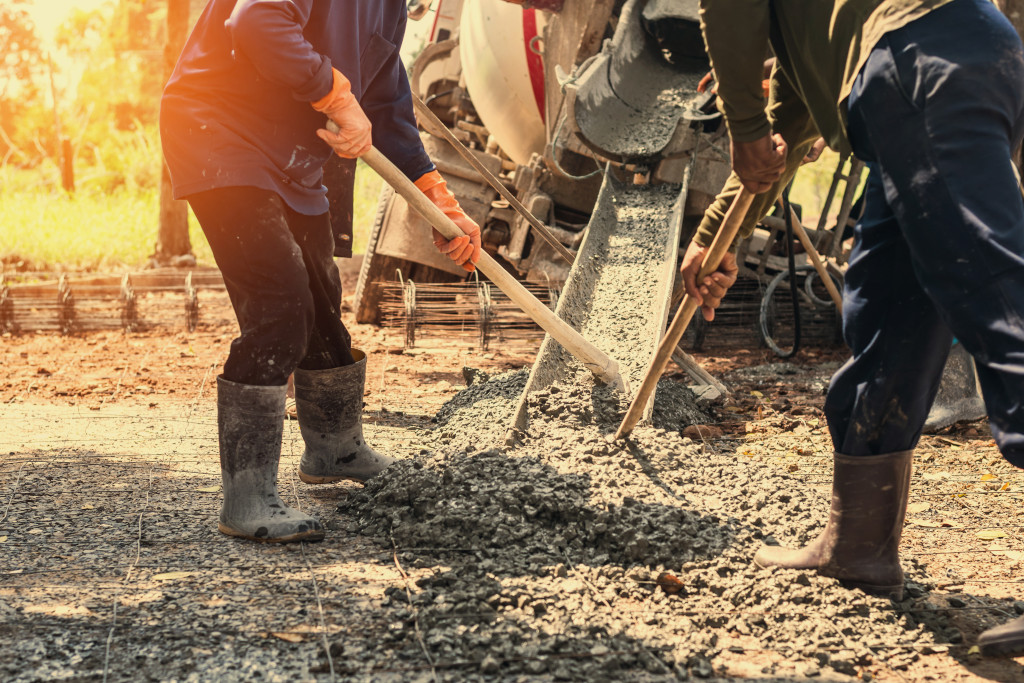
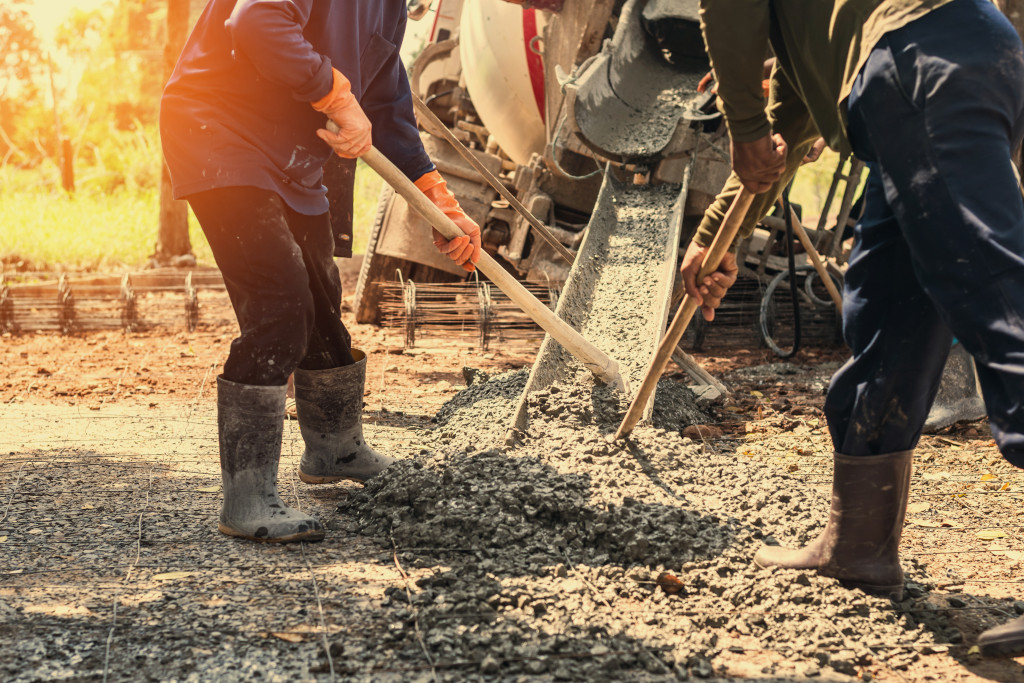
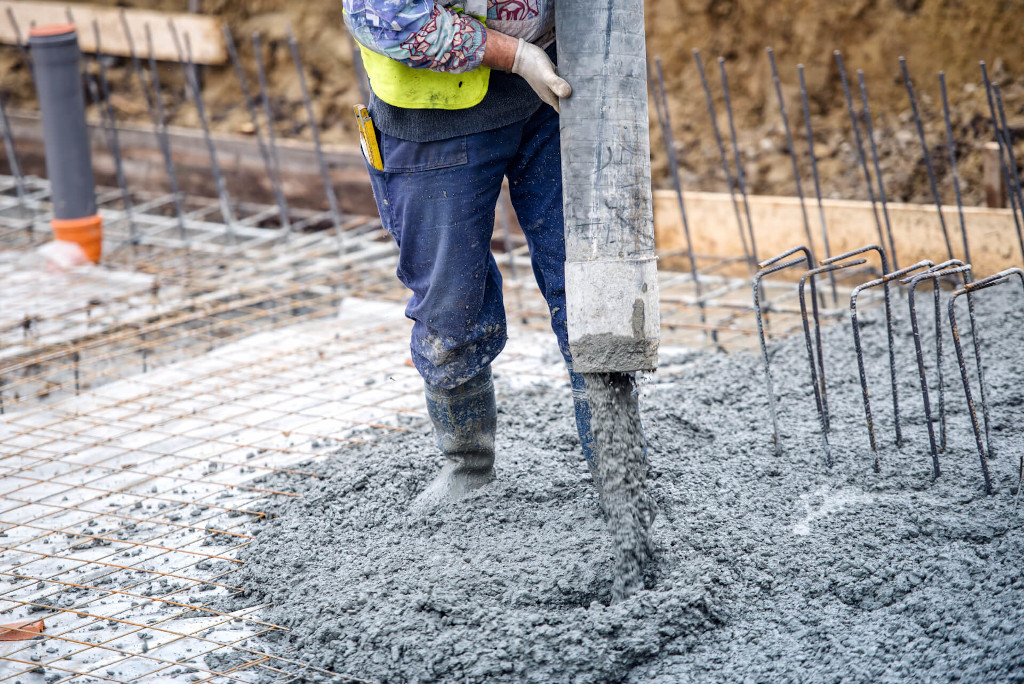
Ready mix concrete is a type of concrete made in a plant and delivered to the job site in a ready-to-use form. It can be used in both residential and commercial applications, but it’s most commonly used for foundations, walls, and slabs.

At Port Aggregates, our concrete mixes are made using limestone instead of gravel, adding extra strength to your product. When you order from us, you can expect superior quality, lower costs, on-site quality control, prompt scheduling, fast turnaround, and more. Contact us today to request a quote

The post Your Guide to the Most Common Types of Concrete appeared first on Port Aggregates.

Benefits of Onsite Mixed Concrete

Benefits of Onsite Mixed Concrete

While you’re in the planning stages of your latest project, have you considered the benefits of onsite mixed concrete? If not, let us explain!

Budget

One of the great benefits is the amount of control that you have if you opt to use on-site mixed concrete. You see with this method you will receive the exact amount and mix of concrete that you require. As a result, you are controlling your budget by only paying for the amount you use. It avoids having loads of unused concrete hanging about!

Consistency of Concrete

Using mixed on-site concrete supply allows you more control over the consistency of the concrete. This is because, with the volumetric mixers that will be used, the materials that go into the concrete are kept separate until the batching process. This will mean you would be able to pick an exact consistency that would suit your needs.


Say, for some reason the consistency required changed halfway through the project, have no fear, as it’s on-site, this can still be altered! The great thing is the logistical advantage-you have when the concrete is delivered directly to your site. You will find that many companies offer next or even same-day delivery.

Fresh Concrete

That points us to another mixed concrete benefit. If you have the supply on-site, you’re providing your team with access to constant fresh concrete. When it comes to the pouring, it is always fresh. There are times when a delay may hit your project but that cannot be helped, and the fact you can keep the concrete fresh is a massive bonus.


Do note that if traditional drum mixers are being used, these can be impacted by delays because of their need to transport pre-mixed concrete in a drum from the yard to a site, meaning there is a chance it could go off. But with a mixed onsite service, there will be the option to change or extend the order on the spot, because the concrete providers will be able to produce the exact type of concrete needed-fresh!

Reduced Waste 

Keeping with the notion of how much more control you have with this concrete set up when it comes to on-site mixed concrete it is easier to scale your needs in relation to project size. Working on a very large site? You would benefit from volumetric mixers as these can hold up to twice the amount of the traditional drum mixers. Or perhaps it’s more of a smaller project? Likewise, on a small site, the mixers can produce smaller volumes with ease. This helps you to have the amounts you need and cut down on waste in the process.

Regarding quality, all the best onsite mixed concrete services will make sure to be providing you with concrete that is made from only the finest materials. Also, keep in mind you will be able to have the mix tailored to suit your needs, so if you require a tougher mix that can be made up or something more workable can also easily be fixed up, no issues.


If you agree that onsite mixed concrete is the way to go for your project, Base Concrete can help. Thank you for reading this blog post. If you are looking for anything to do with concrete, Base Concrete has you covered. Call today on 01442 389105 or visit our contact page for more details.

The post Benefits of Onsite Mixed Concrete first appeared on Base Concrete.

Top Tips To Sealing A Concrete Floor

Top Tips To Sealing A Concrete Floor

How To Seal A Concrete Floor?

Using concrete flooring in your home can be an excellent choice. Especially if you’re interested in the durability of your floor. However, to make a concrete floor last it’s important to seal it properly since concrete is porous.

Sealing a concrete floor is an effective way to keep your floor free of stains from substances such as grease, oil, water, and others. As if that’s not enough, sealed floors look beautiful and are easier to clean.

To ensure that the sealer is effective, however, the application process has to be done properly. Everything you do, from surface preparation to picking the right application tool, will go a long way towards determining the final outcome. 

How To Go About Sealing A Concrete Floor 

Here’s a quick summary of what you should do when sealing a concrete floor

Clean the floor (remove stains, dust, oil, etc. from the concrete)  Remove any old sealer from the floor Use an etching solution to open up the concrete Use a sprayer or roller to apply the first thin coat of sealer  After the first layer has dried, apply a second coat of sealer in the opposite direction Leave the sealer on the concrete until it dries fully (avoid driving or walking on the concrete until it’s dry) 

Cleaning the floor

To avoid inconvenience, you should remove the furniture and everything else from the room. Keep in mind that you will need somewhere to store the items for no less than one week. Once the room is clear, sweep it thoroughly, and then proceed to clean any area that is still dirty. 

You can use mineral spirits to clean grease spills. Once the floor looks clean, use a concrete cleaner to ready the floor for sealing. Rinse the cleaner off, and then wait for the floor to dry. At this point, you can use a concrete repair caulk to fill any visible cracks. Then finally, wait until the caulking has dried completely.

Removing the old sealer

If the floor had an old sealant, you have to wait before applying the new sealant. If you’re not sure whether a sealant was used on your floor or not, you can use water to test this. To do this pour approximately one cup of water on the concrete.

If the water does not soak into the floor but instead beads up and remains on the surface, the floor had been sealed. If the floor had not been sealed, the water would soak into the floor. To remove the sealant, you can use a chemical stripper.

Since chemical strippers are acid-based, be sure to protect yourself when removing the sealant. After removing the sealant, you’ll have to let the floor dry for at least 24 hours before proceeding.

Choosing the sealer

There are four main types of sealers to choose from:

•   Acrylic sealers 

This kind of sealer sits on top of the floor and is mainly used to seal interior floors. Acrylic sealers are easy to apply, but they don’t protect the floor effectively against grease and oil stains when compared to other sealers.

•   Epoxy sealers 

Despite being more durable compared to acrylic sealers, this type of sealer also sits on top of the concrete. Epoxy sealers protect your floor effectively against grease stains, but they are difficult to apply. They are also available in various colors enabling you to change the look of your floor.

•   Polyurethane sealers 

This type is mainly meant for use over other types of sealers. Polyurethane sealers have UV protection, which keeps them from turning yellow over time. They also sit on top of the concrete, but the layer is usually thinner.

For this reason, polyurethane sealers are mainly applied over epoxy as the top layer. The sealers are available in semi-gloss, matte, and glossy finishes. Such sealers are typically fine when used over other sealers, but if you’re not sure, you can always get some clarification from the shop you are buying from.

•   Silane/siloxane sealers 

You can use this type of sealer if you don’t want to change the look of your floor. Since the sealers penetrate the concrete, it won’t become glossy or darker. It will retain the matte grey color. This kind of sealer lasts 20 years or more and is effective in protecting the floor against stains and deterioration.

pplying the sealant

Here’s what you should do when applying the sealant:

1. Carefully read and understand the instructions

Every sealant is a tad different from the other. For that reason, you should read the manufacturer’s instructions to attain quality results for your project. Be sure to pay attention to important details such as the most appropriate temperature and humidity recommendations for application.

2. Ventilate the room

In whatever room you’re working from, ensure that there is enough ventilation by opening the windows and doors where applicable. You can also use an outside-facing fan to facilitate the movement of air from the room to the outside area.

3. If using an epoxy sealant, mix the two parts together

Epoxy sealants come in two different containers whose content should be mixed before application. In such a case, you should pour the content of the smaller container into the bigger one and then use a stir stick to mix them thoroughly.

You should mix them only if you’re ready to start the application process. It’s also important to note that you’ll have a period of one hour or so to get the epoxy down. For that reason, you have to be quick when working.

4. Divide the room into smaller sections 

It’s recommended that you divide the room into four sections for ease of application. You should start with the least accessible section, and work your way out to the door so that you won’t have to walk on the wet sealant.

5. Use a small paintbrush when sealing the edges of the floor

Get a paintbrush that is 5.1 to 7.6 cm wides and use it to apply the sealer along the edges of the concrete floor where the paint pad or rolling brush may not reach. Be sure to use nice, even strokes when applying the sealer.

6. Apply the sealer using a rolling brush or paint pad 

Pour some sealant into a painting tray and then dip a roller brush or a paint pad into the paint. If using a roller brush, be sure to roll the brush evenly in the paint. Use the roller brush or paint pad to apply a thin coat of the sealer along the edge that you’ve already painted.

Continue applying the sealer across the floor until you’ve covered the entire floor. When applying the sealer, you should ensure that there is always a wet edge to carry on from. The reason for doing so is to achieve a uniform look on the floor. 

Since you’ve already divided the room into smaller sections, you can work on each one of them at its own time. As you apply the sealer, make sure that you spread it evenly across the floor. You should also keep track of your area of coverage to avoid ending up with some patches that haven’t been sealed.

7. Apply a second coat 

For a smooth and even finish, you should apply a second thin coat. To ensure better coverage of the sealant across the floor, you should apply the second coat at right angles to the first one. Let the sealer dry as per the time recommended by the manufacturer on the sealant can, before walking or driving on the concrete. You should be ready to wait for up to four days to allow the sealant to dry completely.

Final thought, 

Sealing your concrete floors is a foolproof way to increase their lifespan while also enhancing their beauty. The good thing is that you can easily complete a floor sealing project by yourself. If, however, you’re not particularly confident with your DIY skills, you should hire an expert.

If any of our high-quality services interest you, give us a call on 01442 389105 or 07812 182778 today. Or fill out the enquiry form on our contact page for more information.

The post Top Tips To Sealing A Concrete Floor first appeared on Base Concrete.

Concrete Hardening with Hard-Cem®: Frequently Asked Questions

Concrete Hardening with Hard-Cem®: Frequently Asked Questions

No matter where you are in the construction industry, you want the structures you work with to last. After all, no one likes to hear that their work failed to live up to expectations. And the expectations for long-lived structures have only grown, increasing as the concern for sustainability and climate change rise. There’s also now more demand for environmentally friendly structures that can resist harsher climates. In short, now more than ever, you’re looking for ways to keep your structures standing for as long as possible and to help them survive the wear and tear of weather and everyday activity.

In your search for the right solution to this, you may have come across our integral hardening admixture, Hard-Cem. Known widely to be a great solution for warehouse durability (and more), it’s been applied to over 7 million m2 (80 million ft2) of concrete across Canada.

But what makes it so popular? And why should you consider it for your future projects? These frequently asked questions and more have been given a great deal of thought in a number of our other articles. But to make sure you get all your answers in one place, we’ve decided to respond to these questions in an easy-to-read guide here.

So, What Is Hard-Cem Exactly?

As we briefly touched on earlier, Hard-Cem is an integral hardening admixture meant to make concrete more durable against abrasion and erosion. In fact, it’s the only one of its kind on the market currently!

Other concrete hardening solutions typically come in the form of dry shakes, liquid hardeners, or other conventional forms. However, they can also come with application concerns.

For one, dry shake products usually have a complicated application process, so there is a higher risk of applying them incorrectly. And because these products often come with toxic silica dust, workers are more likely to get exposed to that material and develop health problems.

Liquid hardeners, on the other hand, while safer and less complicated to use, are just not that effective. They’re designed to reduce dust from weak, improperly finished or fast-drying concrete slabs. They aren’t and shouldn’t be expected to increase concrete hardness to prevent abrasion or erosion.

And both dry shakes and liquid hardeners require time-consuming manual labor, which often requires expensive equipment.

Hard-Cem, however, is free of all these concerns! Because it’s an admixture, it just needs to be added to your concrete mix. And that’s it! It only has one step, so there’s no risk of applying it incorrectly. Hard-Cem also does not expose workers to silica dust, so it helps make jobsites safer. As a result, with Hard-Cem, you get an easier and safer way to create concrete that is harder and better able to resist abrasive and erosive forces.

How Does It Help with Concrete Hardening?

To help with concrete hardening, Hard-Cem is first added into the concrete mix. From there, it disperses throughout the mix, allowing hard particles to get embedded into the cement paste, increasing the hardness of the entire concrete slab. In turn, the cement paste wears more slowly, which reduces material loss that would normally expose the underlying aggregates and make the slab uneven and less functional.

All of which helps double the wear life of the concrete and increase its resistance to abrasion and erosion. And that remains a permanent, life-long feature for the concrete as Hard-Cem becomes a fundamental part of the concrete mix.

Will It Increase Concrete Performance?

Outside of extending your concrete’s wear life and raising your concrete’s resistance to abrasion and erosion, Hard-Cem can also increase your concrete’s chipping resistance. In short, it increases your concrete’s performance in terms of durability against physical wear and tear.

In fact, Hard-Cem is capable of doing this for both regular concrete slabs and concrete joints! However, it’s important to note that if you’re expecting severe wear on your concrete joints to the point that joint-armoring technologies are required, Hard-Cem is not meant to be a replacement for that technology specifically.

How Does Hard-Cem Increase Concrete Durability without Increasing Cement Content?

The fact that Hard-Cem doesn’t increase cement content might seem surprising at first considering it’s common to increase the cement content of your concrete to boost its durability. But keep in mind that Hard-Cem is an additive that strengthens and reinforces cement paste.

A good example for how that works is to think of additives that can be used in tire manufacturing. You’re still using the same amount of rubber, but the tires themselves can be manufactured to be more durable and abrasion-resistant.

Hard-Cem works in a similar way. It’s acting directly in the cement paste to reduce the rate of wear loss. So even though the bulk concrete still has the same or similar compressive strength and properties with Hard-Cem, the addition of Hard-Cem will still help reduce the wear of concrete when it is subject to abrasive and erosive forces. And it does that without the need to add more Portland cement to your concrete mix, allowing you to strengthen it and maintain lower carbon emissions.

How Is It Added to the Concrete?

Hard-Cem is added right into a concrete truck at the batch plant through your local concrete provider. There are no extra steps, and it ensures Hard-Cem is properly added to your mix before you start pouring your concrete. Hard-Cem is available in easy-to-use mixer-ready bags or bulk silo deliveries for larger jobs.

What Projects Can It Be Used For?

It can be used in any project of yours that needs a strong resistance to abrasion and erosion. That typically applies to warehouses. But there are so many more worthwhile applications!

Other projects that often get the most benefit out of Hard-Cem include the following:

Industrial service and repair baysHighway pavements and intersectionsBridge decksRunwaysParking structures, ramps, and apronsSkate parksTunnelsShaftsProcess buildings for mining, oil, and gas industriesUtility and maintenance buildingsLivestock housingStorage shedsTractor garagesDamsSluiceways, spillways, and drainage conduitsStilling basinsCulverts and precast pipesCanalsBlocks and pavers

Is Hard-Cem Compatible with Supplementary Cementitious Materials?

Yes, Hard-Cem has been successfully applied in a number of projects that use supplementary cementitious materials (SCMs), such as fly ash, ground-granulated blast-furnace slag, and silica fume.

Is It Compatible with Air-Entrained Concrete?

Also, yes! Hard-Cem is fully compatible with air-entrained concrete. Hard-Cem is not harmful to the air-void system. And air-entrained concrete treated with Hard-Cem remains highly durable to freeze-thaw cycles and salt scaling.

Is There Anything It Isn’t Compatible With?

In general, Hard-Cem is a highly versatile admixture! In addition to being compatible with SCMs and air-entrained concrete, it can be used for a wide variety of concrete placements whether they’re horizontal, vertical, or inclined.

Even its application can be versatile. Hard-Cem works with ready-mix, shotcrete, and precast concrete applications.

And no matter what mix you use, which concrete placement you go with, or how you apply it, Hard-Cem will not negatively impact your concrete’s water demand, workability, set time, strength development, or shrinkage. Instead, you’ll get the same concrete but with better durability.

Does Hard-Cem Change the Concrete’s Finishing Properties?

No, Hard-Cem does not change the finishing characteristics. In fact, finishers report a high level of satisfaction when working with the admixture. Moreover, Hard-Cem can be used with any specified finish.

Do You Have Any Other Resources That Can Teach Me More about Hard-Cem?

If you still have some questions about Hard-Cem or just want to satisfy a more personal curiosity in our novel concrete hardener, we have plenty of digital resources just for you:

Articles“The Top 4 Types of Smart Concrete Technologies to Boost Concrete Construction”“A Study in Durable Design: Creating the Award-Winning Metro Skate Park”“Hard-Cem: It’s Not Just for Warehouse Floors”“Why Hard-Cem Shotcrete Should Be Your Solution for Durable Concrete”“Liquid Hardeners vs Hard-Cem: Which Is Better for Concrete Durability?”“Lower Your Concrete Carbon Footprint with These 4 Innovative Methods”“Silica Dust: The Dangers and How You Can Mitigate Them”“Convert Your Concrete Slab from a Maintenance Liability to an Asset”


Case StudiesVancouver Convention CentreBear Creek HydroBrandt Tractor Ltd. warehouseAn Abbotsford residential workshopAshbridges Bay Skate Park


Educational ContentWebinar on integral concrete hardening for wear-resistant concreteHanley Wood University’s course on our integral hardening admixture for wear-resistant concreteConstruction Canada’s demo-cast recording on Hard-Cem

If I’ve Already Decided to Add Hard-Cem to My Project, Where Would I Get It?

We offer Hard-Cem through concrete providers around the world. So if you’d like to add Hard-Cem to your project, get in touch with your local provider. You can also check out our website for a list of contacts who could help you with your Hard-Cem needs.
The post Concrete Hardening with Hard-Cem®: Frequently Asked Questions appeared first on Kryton.

Did you miss our previous article…
https://cedarparkconcrete.org/?p=281
Interview: Optimizing Concrete Compressive Strength Monitoring for a Treatment Plant

Interview: Optimizing Concrete Compressive Strength Monitoring for a Treatment Plant

Treating about 80% of San Francisco’s water since 1952, the Southeast Treatment Plant has been a critical structure for sanitizing the wastewater of San Francisco. However, the plant has been around for years, and now, many of its facilities need an upgrade.

Knowing this, the San Francisco Public Utilities Commission has started modernizing the plant. Part of this transformation includes replacing the treatment plant’s headworks facility with a new one. That will ensure the treatment plant will be able to more effectively remove debris and grit from the water while meeting the current seismic standards.

To construct this more modern headworks facility, the San Francisco Public Utilities Commission has collaborated in a joint venture with The Walsh Group Ltd. and Sundt. And we are pleased to note that we are helping The Walsh Group Ltd. optimize their work in this venture with our Maturix Smart Concrete Sensors.

Our Maturix specialist, Kris Till, got to discuss this in a recent video interview that he conducted (which you can see here). And in this article, you’ll get to see that discussion along with some extra details on the topic.

Why don’t we get started by having you tell us who you are, who you work for, and what you’re building?

My name is Tanner Santo. I’m a superintendent for The Walsh Group here in San Francisco, California. We are building the new headworks for the Southeast Treatment Plant. It’s going to be up to a 300-million-gallon-per-day capacity in the wet season. We’re looking at probably a good two years of structural concrete, which will primarily be my focus.

What do you consider to be the most important factor when building a project like this?

I think one of the biggest things I look for as a superintendent is to maintain efficiency while also preserving quality. There are a lot of moving parts and challenging logistics on this project. And what we need to do is just get our crews into a rhythm.

So, why are you monitoring concrete in this project?

That’s actually a very good question. We’re doing a lot of vertical walls on this job. I think we have 300 to 400 different wall placements. And the big thing for us is that we cannot strip those forms until we reach a minimum compressive strength.

What would you have done in the past to monitor your concrete compressive strength?

So, in the past, in situations like this, we pour a wall, say on a Monday, and take a bunch of concrete cylinders. By Tuesday morning, they’re sent off to a lab. If I want early breaks to remove the formwork, I need to take extra cylinders.

The extra cylinders can be costly when you talk about hundreds of wall placements. So taking and breaking extra cylinders for every placement adds up very quickly.

What’s even more of a hassle is getting those break results. So if I put in a 30-foot-tall [9.14-meter-tall] concrete wall on a Monday, Tuesday morning, I’m waiting on a testing lab to give me early breaks back, and what I need them to tell me is that the concrete has reached a minimum strength. So in that morning time when I’m waiting for a break result or for the testing lab, I have a crew of guys who are basically not being efficient. They can’t strip the formwork yet.

nd what’s your current concrete monitoring process like now?

We put a few thermocouples with the Maturix Sensors into the wall at the time of placement, and thanks to the maturity curve that we’re able to calculate with the help of CEMEX, our concrete provider, we actually get a live readout of compressive strength. If we had never run this maturity curve for these sensors or monitored the live compressive strength with the sensors, I don’t think we ever would have realized how quickly we were getting concrete strength on this job.

It gives me a lot of temperature data as well. Had those sensors not been there, we wouldn’t have realized that we are working with a relatively hot mix. We now exercise some caution with some of those thicker placements that I don’t think we ever would have previously because we just wouldn’t have known what type of internal temperatures we were getting on this job. That information alone has been a big help as far as planning and scheduling goes.

It’s even so streamlined that I have notifications set up to my cell phone. I’m not waiting on a call from a testing lab. I’m not hounding a testing lab. I actually get a ding on my phone, but on this project, it’s a bit unique. It’s actually kind of in the middle of the night or the early, early morning when it tells me that a wall has reached 1,250 psi [8.62 MPa]. That way at 7 am, when the guys show up to work, we’re not waiting on anything. We immediately get to work taking the forms off. I know the wall has reached a compressive strength where it’s safe to do so. There’s really no second-guessing anything. And that helps with the logistics of cranes and organizing manpower.

Why did you specifically choose Maturix?

What made Maturix the number one choice was just the cost-effectiveness of it. A lot of the competitors have one-time-use sensors where you’re paying up around $100 a sensor and you embed it into the concrete. In every single pour, that’s $100 down the drain whereas Maturix technology is actually better because I don’t have to go around and capture the data with Bluetooth. It’s all done over a cloud network. It’s sent directly to my phone like I mentioned. I don’t have to pay someone to go around and collect data via Bluetooth. So in reality, I’m paying less for a better product.

So it seems Maturix offers cost-effective concrete compressive strength and temperature monitoring. It also documents everything related to this. Has that helped you with quality control procedures?

Yeah, definitely. It just basically organizes all our pours. I mean, I can go back to stuff I poured a month ago and see that Maturix records the exact time of placement.

What would you tell someone who is considering Maturix?

It’s streamlined. It’s easy. As far as cost-effective, it’s not even close compared to the competitors out there with the one-time-use sensors. And the labor you save in collecting the data is also a huge cost saving as well. So we’ve just been very happy with what these sensors have provided for us here.

Thank you so much for taking the time to talk with us. We really appreciate it.

No problem. You guys are helping us out a lot on this project. We got a good thing going here, so I’m happy to help out.

*Banner photo by Pi.1415926535, CC BY-SA 4.0 , via Wikimedia Commons

The post Interview: Optimizing Concrete Compressive Strength Monitoring for a Treatment Plant appeared first on Kryton.

Did you miss our previous article…
https://cedarparkconcrete.org/?p=270

How Combining Concrete Admixtures Simplified Aquatera’s Expansion

How Combining Concrete Admixtures Simplified Aquatera’s Expansion

Ever thought about what it takes to keep the water you drink and the water you see outdoors clean? It’s not often considered! But there are companies who work tirelessly to make it all happen. Aquatera is one such company. Since 2003, they’ve acted as the owner and operator of water and wastewater treatment and transmissions systems for the City of Grande Prairie in Alberta, Canada.

Under their direction, Grande Prairie’s citizens have been able to enjoy safe, clean drinking water and ensure that their wastewater returns fully sanitized back to the Wapiti River. It’s a direction that worked for a decade.

However, by 2013, Grande Prairie’s population had grown by more than 18,000 people. While that was great for the area’s economy, it left Aquatera’s plant running at full capacity. If the population grew any further, the plant would not be able to accommodate the increase in demand.

Determined to leave no person without their essential service, Aquatera chose to expand their plant.

quatera’s Expansion Would Involve Multiple Additions to Their Plant

It would also cost a pretty penny! For over $58 million, Aquatera would be able to fully upgrade the plant to include the following:

Two new biological nutrient removal reactors (BNRs)Two new circular secondary clarifier filtersA new centrifuge building

While this upgrade would be expensive, the end result would be priceless. These additions would give Aquatera’s plant two major benefits that would keep it running throughout Grande Prairie’s ongoing growth spurt.

They Would Help the Company Meet Current and Future Regulations

As a company that handles the water and wastewater treatment for a whole city, Aquatera is beholden to a number of rules and best practices. These come in the form of provincial and federal regulations and guidelines. And they also include individual municipal utility bylaws from four shareholders.

Of course, it also means that Aquatera needs to periodically update their system to meet the latest standards. Taking that into account, Aquatera knew they’d need their upgrade to address this. That’s why they chose to add two more BNRs to their plant. Both would allow them to satisfy the needs of Grande Prairie and meet current and future regulations surrounding those needs.

nd They Would Also Increase the Company’s Overall Efficiency

More importantly, all of the additions to Aquatera’s plant would give it the ability to work more efficiently. For instance, the plant would be able to treat 12,000,000 more liters of wastewater a day than it would have before. To put that into perspective, the plant’s original capacity limited the plant to treating 22,000,000 L of wastewater a day. But with the upgrades, the plant would be able to treat up to 34,000,000 L daily.

On top of that, the upgrades would also increase the plant’s sustainability. They would give the plant a longer life span while reducing how much power it consumes and how many greenhouse gases it emits.

Combining this new capacity increase and sustainability enhancement meant that the plant would be able to work in a more eco-friendly manner while having the capacity to serve a growing population.

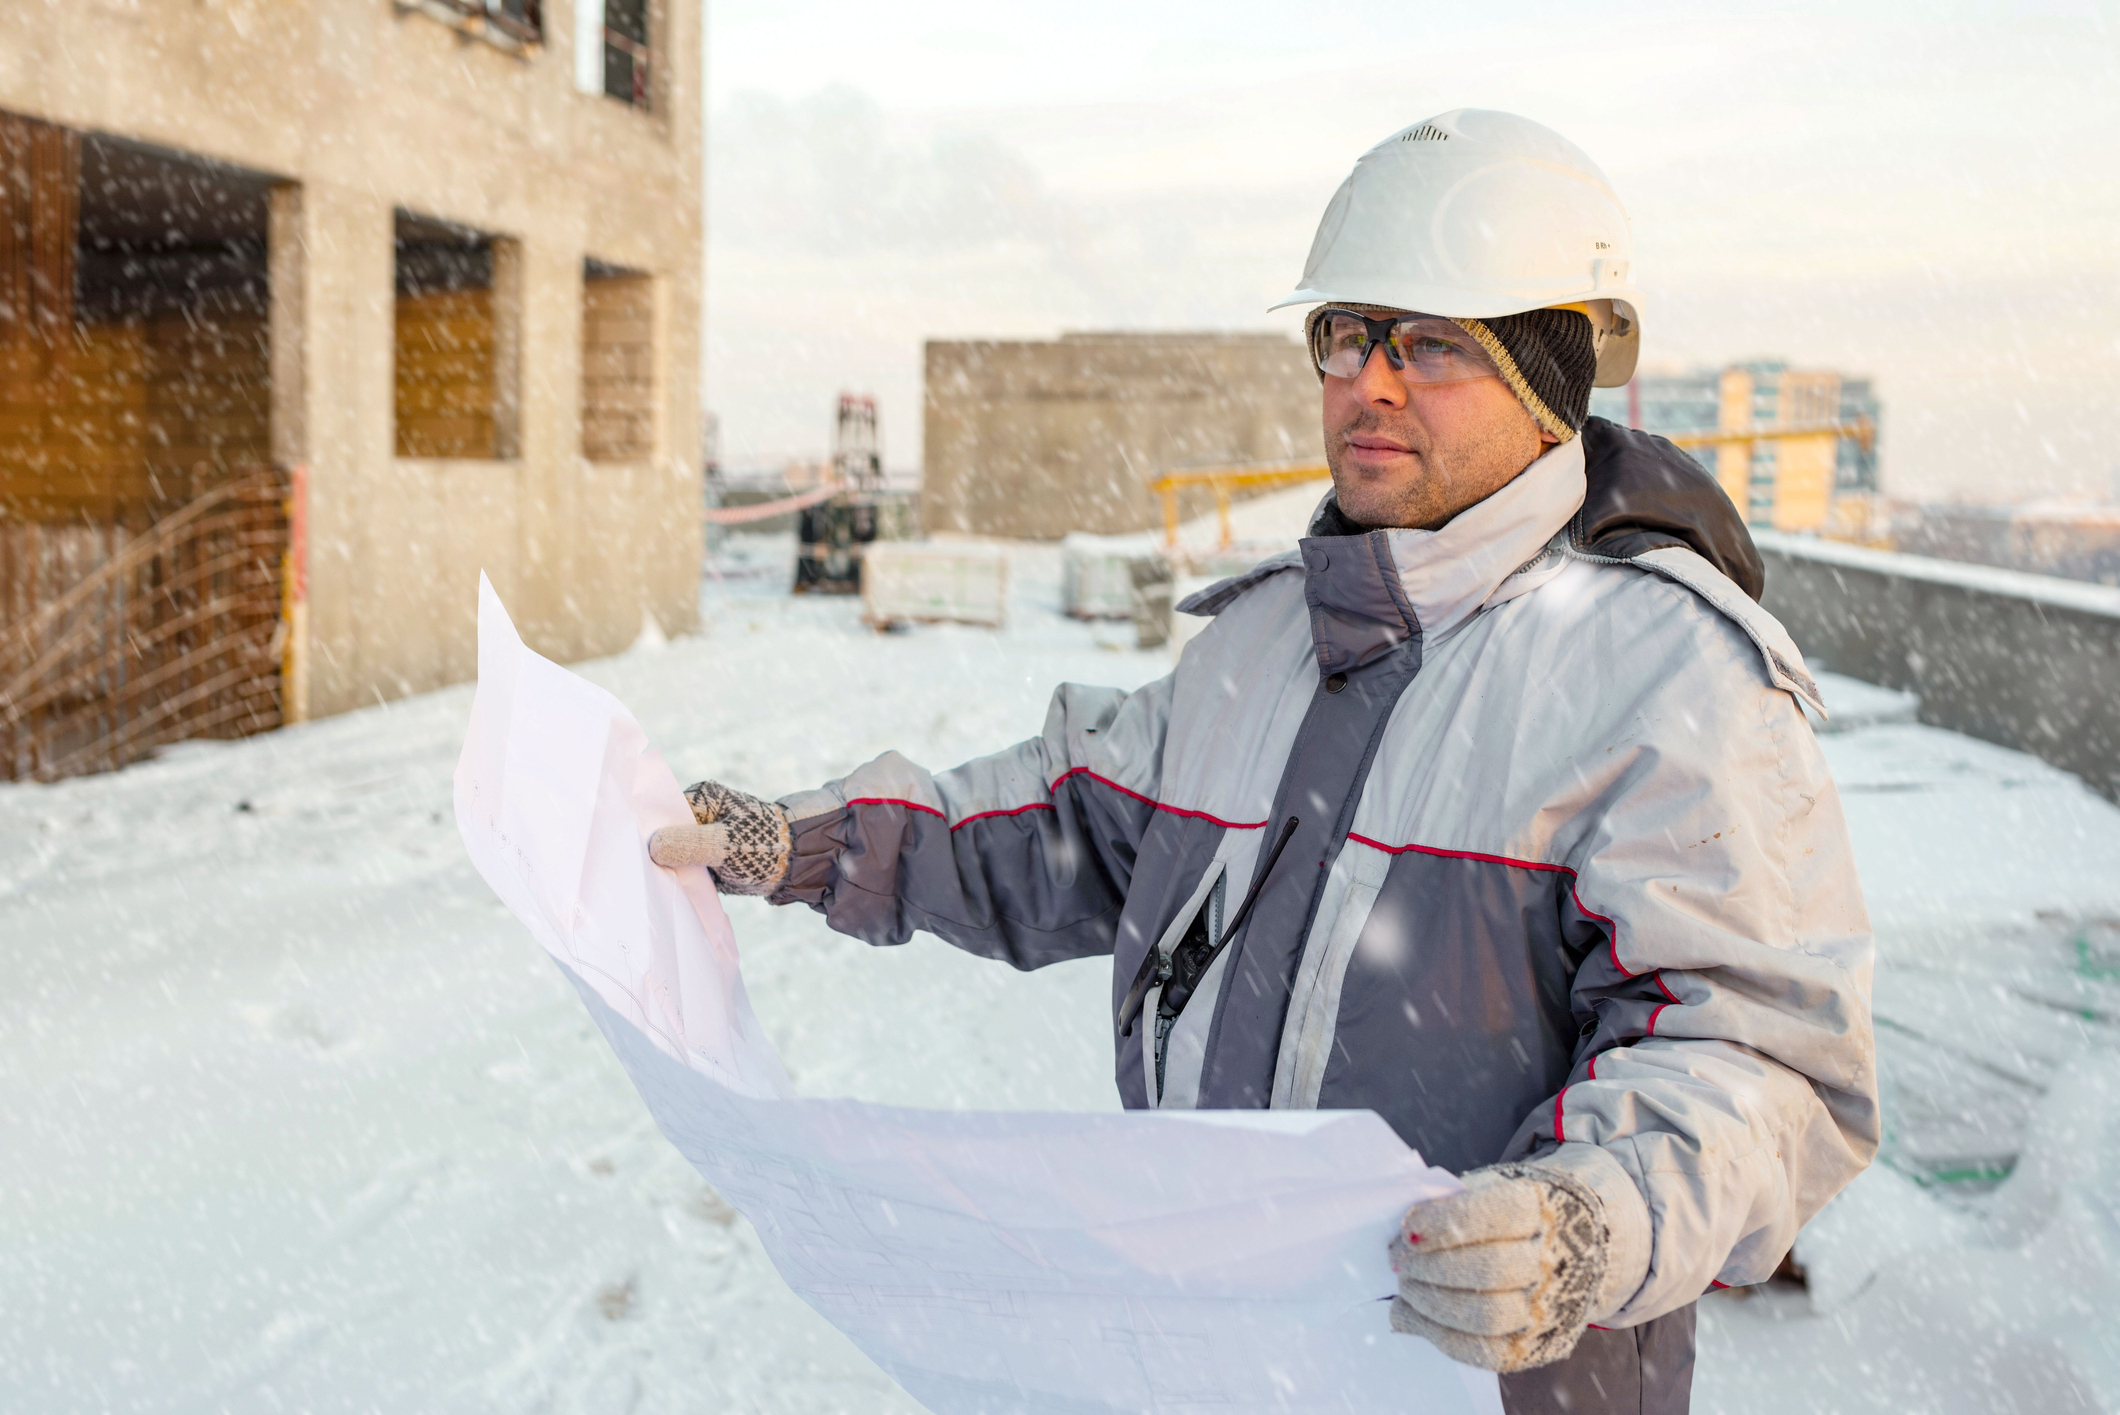
A civil engineer is holding up blueprints while in snowy weather, determining how they'd want to use their concrete admixtures.

But These Upgrades Came with a Couple of Challenges

While Aquatera was eager to start upgrading, they had to make sure their construction team would be able to complete the project on time while working in Alberta’s harsh wintery conditions.

With that in mind, it was clear to them that working with concrete in such a climate meant they’d need a time-effective solution that could give them both permanently waterproof and highly durable concrete. And this solution would need to be able to handle significantly cold temperatures over the winter season. In short, it would have to be an innovative solution.

They Couldn’t Go with a Conventional Surface-Applied Solution

Traditional solutions like surface-applied concrete waterproofing and hardening products are costly and time-consuming. After all, crews need to be scheduled to handle the application. And that can involve the need to spend more to hire extra workers and expensive equipment. Even if all those costs could be managed, it still means waiting for the workers to finish their manual application.

At the same time, that process adds the risk of application errors. No matter how well trained a manual applicator is, they’re only human. So there’s always a chance that the application will not uniformly cover the concrete. And that could leave weak spots in the finished concrete structure.

If Aquatera wanted their concrete waterproofing and durability solution to be both timely and cost-effective, they would need to look elsewhere.

They’d Also Need to Be Careful of the Weather

No matter what they chose as their solution, the construction team would still have to make sure that it could handle the wintery weather. With surface-applied solutions, that could prove to be difficult. It would double the amount of heating they’d have to worry about after all. Both the solutions themselves and the surrounding ground would need to remain unfrozen. Otherwise, the cold weather would interfere with the process, making the concrete set more slowly. That in turn would make the surface application take even more time. There would even be the possibility of the concrete slab crusting, where only its top part sets.

So, if Aquatera’s upgrade was ever going to happen, the company’s construction team would need a non-surface-applied solution that could handle the cold weather just fine.

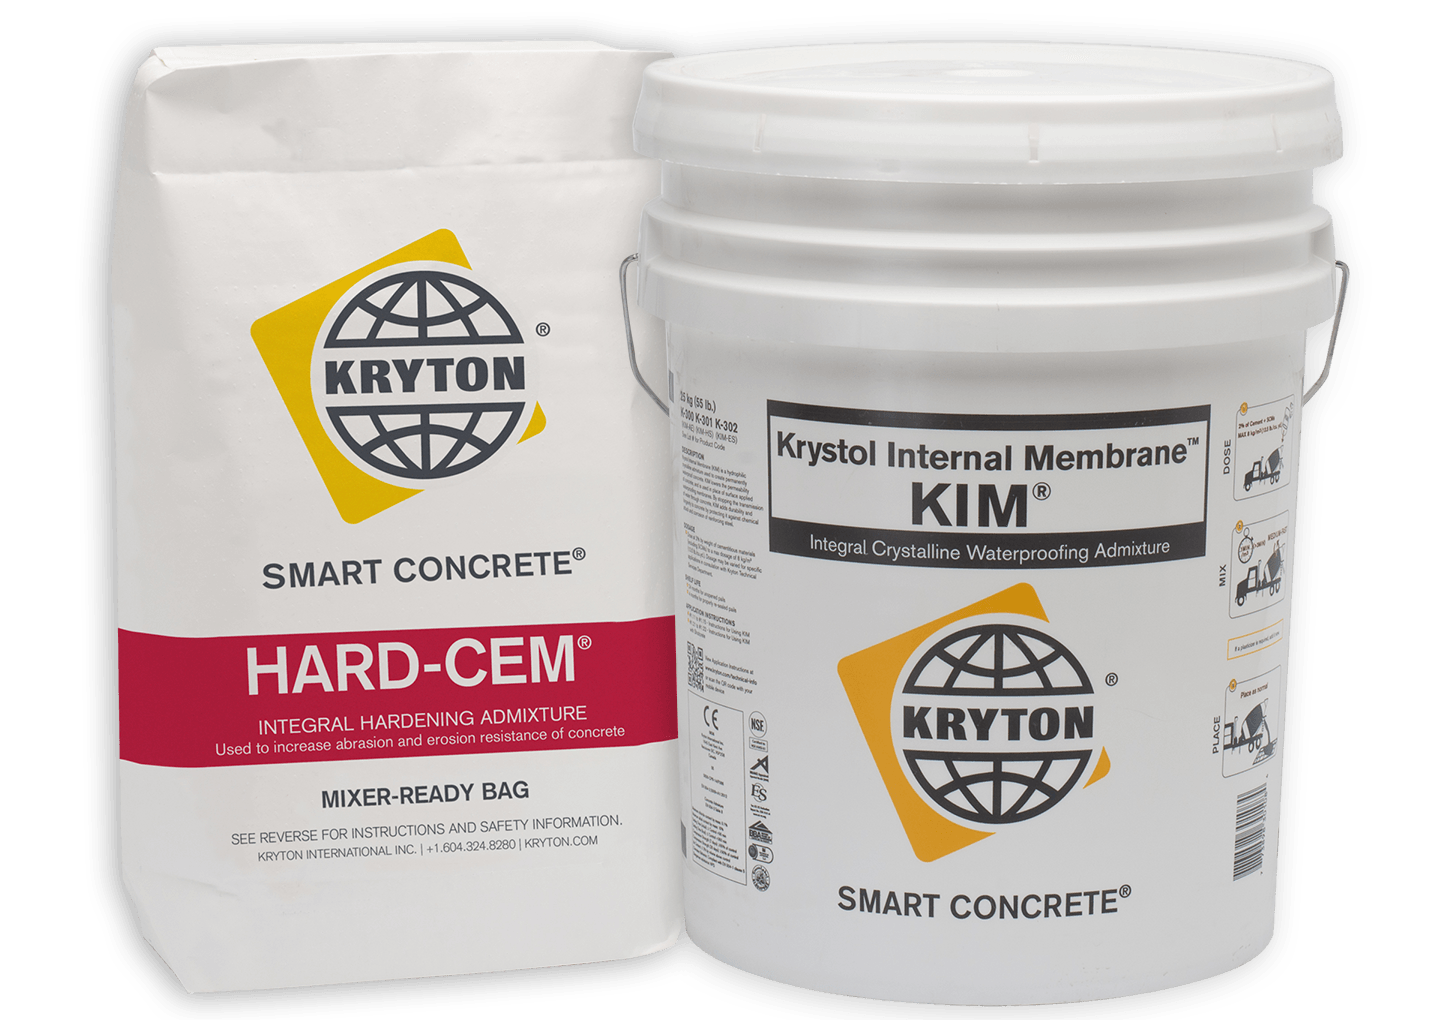
Kryton's KIM and Hard-Cem admixtures ready to optimize building space.

To Manage These Obstacles, Aquatera Chose Smart Concrete Solutions

The main challenge for Aquatera was eliminating the difficulties that come with surface-applied products. Luckily, they soon came across Kryton’s Edmonton distributor, Cascade Aqua-Tech Ltd. From there, they were able to secure their very own supply of our integral concrete waterproofing admixture, Krystol Internal Membrane
™
(KIM), and our integral concrete hardening admixture, Hard-Cem

Using the Concrete Admixtures KIM and Hard-Cem, They Were Able to Ease Their Construction Timeline

Because both KIM and Hard-Cem are integral admixtures, they can be added directly into a concrete mix. That eliminates the need to hire extra labor to apply waterproofing and hardening solutions. There’s also little concern for application errors. Instead, each admixture will permeate throughout the concrete, giving it an even, thorough dose of waterproofing and hardening.

The construction team benefited from this approach, adding the products to the concrete mix to meet the specific needs of the wastewater treatment plan.

For KIM, they started by adding it separately to the following:

Some slabs and retaining walls for the gallery and tunnel raftExposed structural concrete that was covering the first two structuresA raft slab and some compartment walls for the BNRs and circular secondary clarifier filters

That allowed KIM to protect each area from potential chemical attacks as the Krystol technology within the admixture could form interlocking crystals that block out water and waterborne particles and fill up any spaces that either might pass through.

For Hard-Cem, they added it separately to the centrifuge building’s slab-on-grade. That would double the building’s resistance to abrasive and erosive wear so that it could withstand the exposure to chlorides and severe amounts of sulfate from the wastewater treatment process.

And for extra protection for the plant’s steel deck, the construction team added both KIM and Hard-Cem to the concrete mix, giving the deck’s surrounding concrete protection against moisture ingress, chemical attack, and abrasive and erosive wear.

Even When Weather Conditions Worsened, Their Construction Still Went By Relatively Smoothly

Because of how easy it was to apply these concrete admixtures, the construction team was able to diligently and effectively continue their work throughout two snowy winters — even when one winter came with a snowfall that was over 10 ft!

Such weather would have made it harder to work with surface-applied concrete waterproofing and hardening solutions as the solutions themselves would have needed protection from the cold.

But with the instant application of concrete admixtures KIM and Hard-Cem, where they can be directly added to the concrete mix during batching, it made it easy for the construction team to both waterproof and harden their concrete. There was no concern over protecting the admixtures after all. The admixtures would simply go into the mix and provide their benefits while the team could carry on with heating the ground and properly placing and curing their concrete.

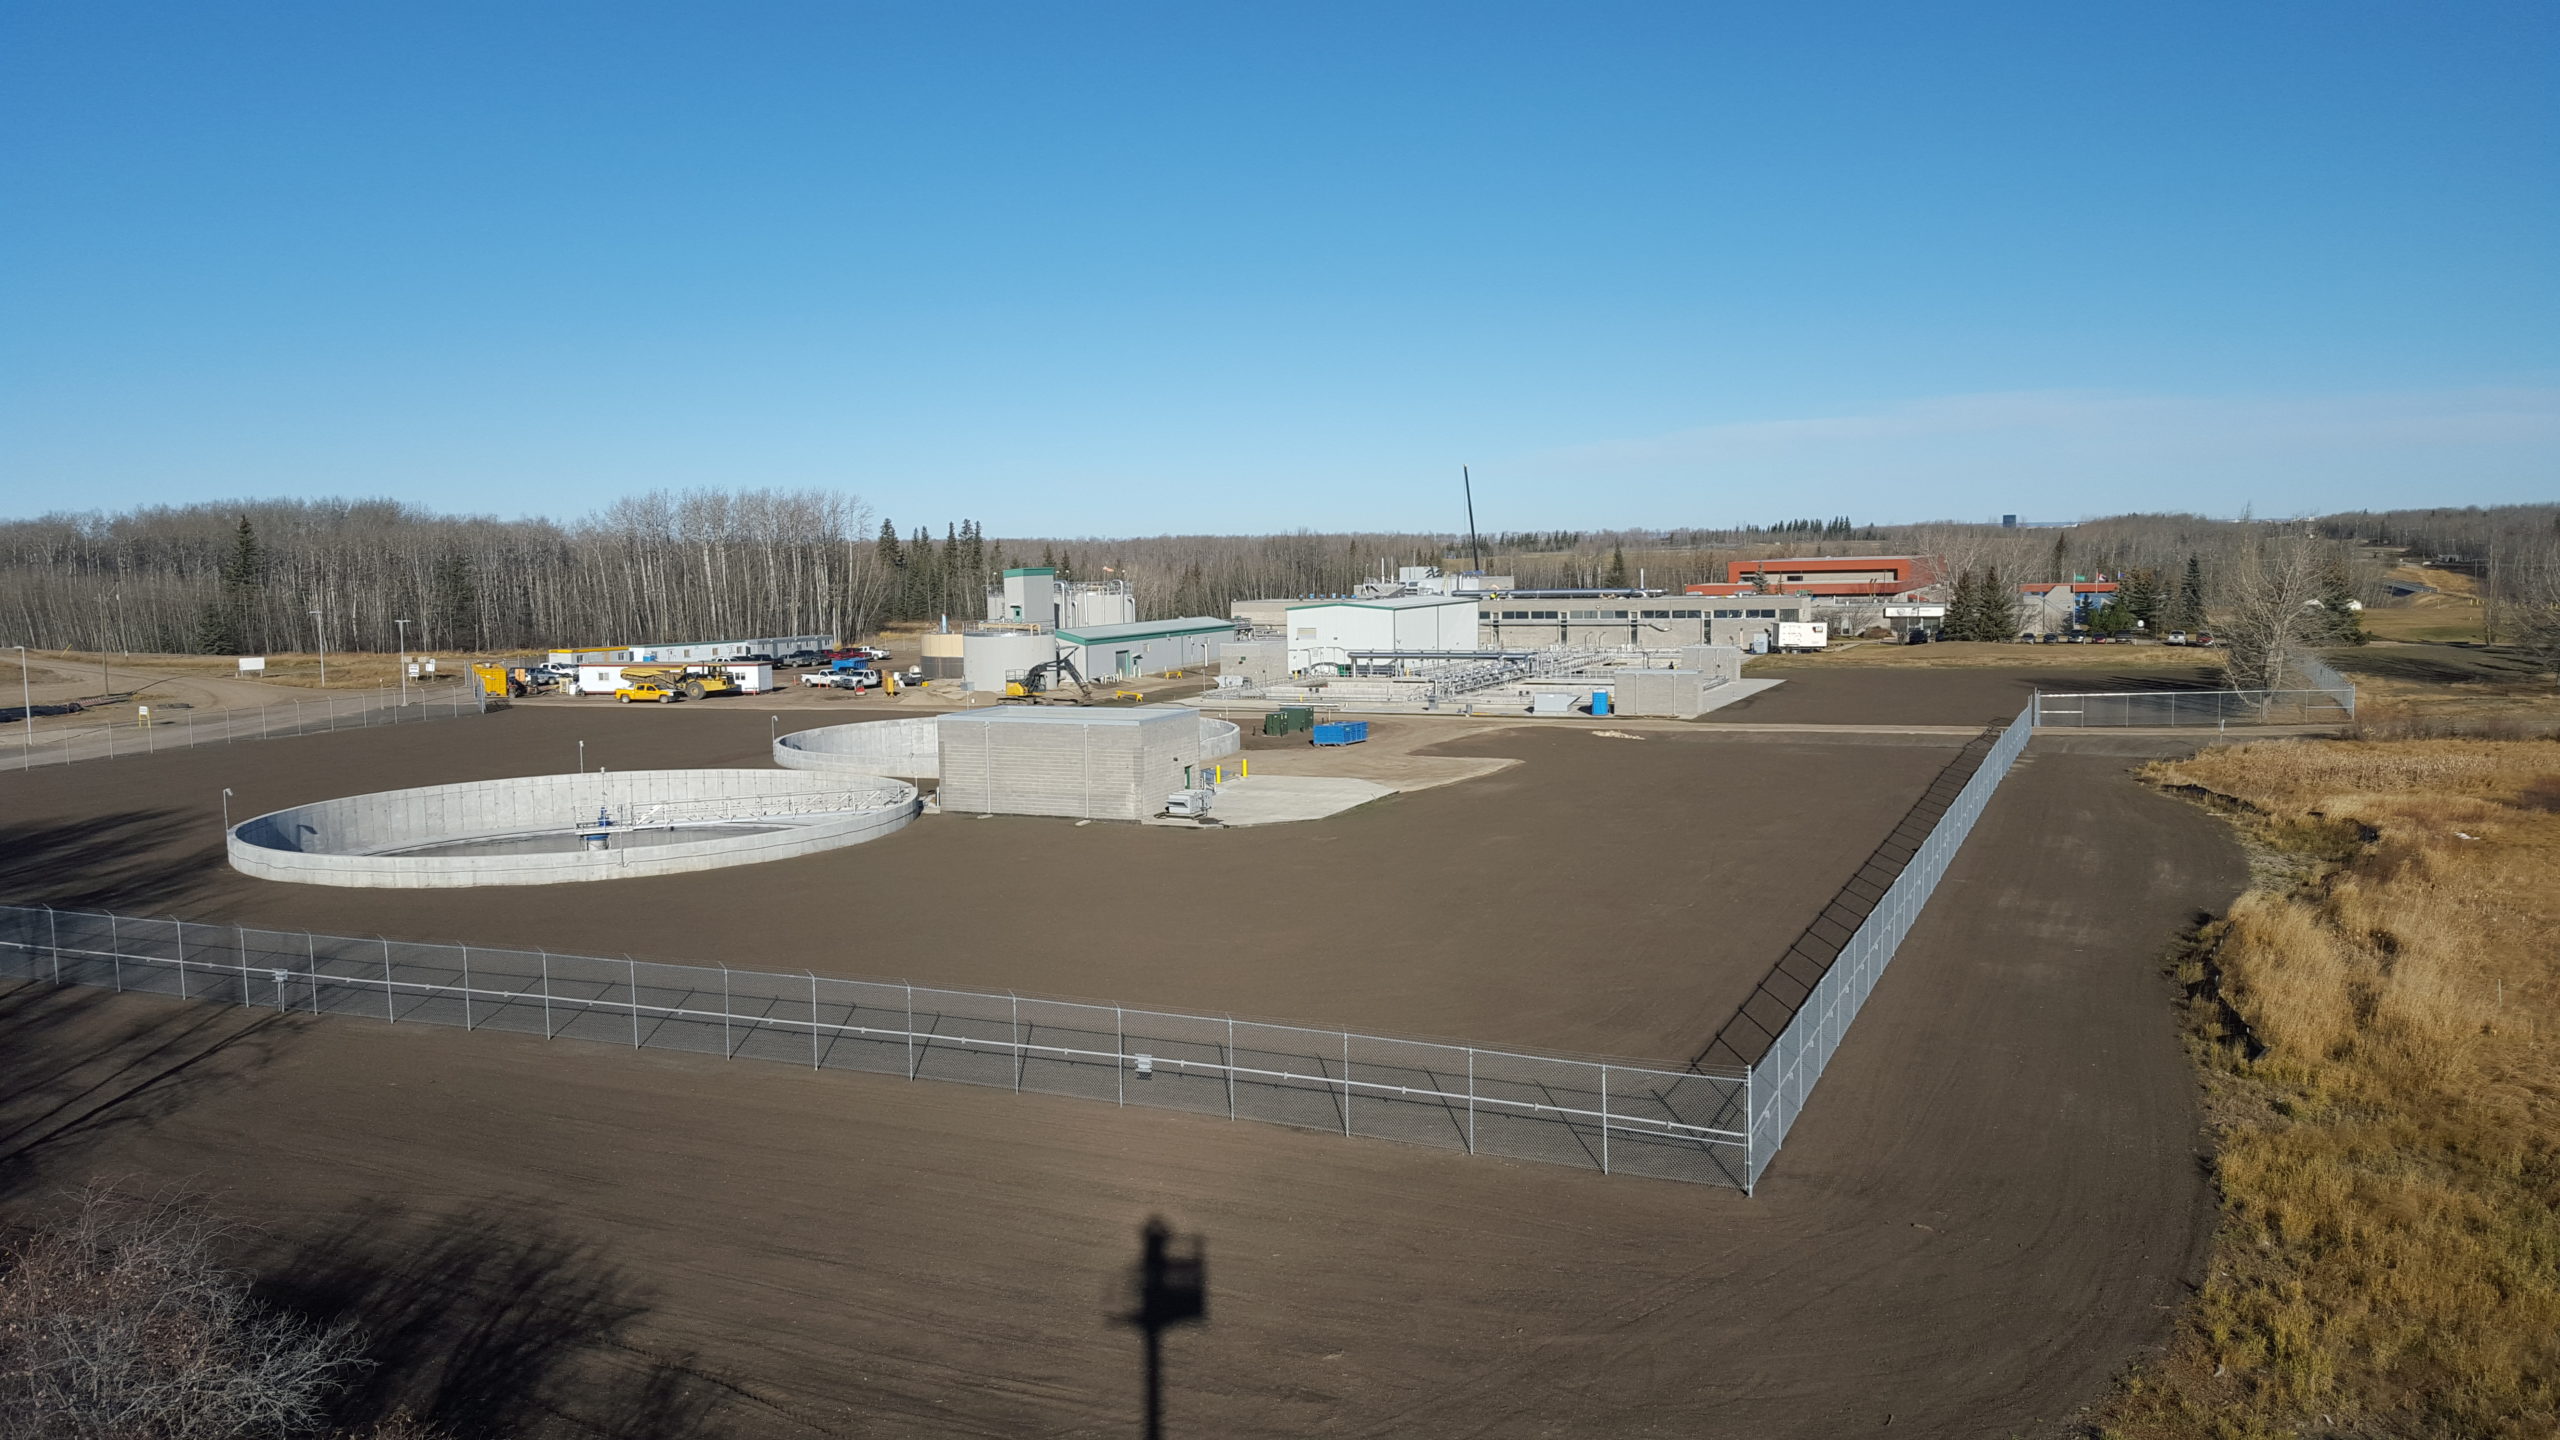
Aquatera's worksite rests in the background of the shot, showing a more complete project.

Overall, KIM and Hard-Cem Transformed Aquatera’s Expansion into a Success 

In the end, thanks to the concrete admixtures, KIM and Hard-Cem, Aquatera’s construction team was able to upgrade the wastewater treatment plant within their timeline. It was a successful bit of construction that was only further proven to be so when the upgrades passed every hydrostatic test the team put them through.

Both KIM and Hard-Cem have gone on to contribute to many other success stories like this one. If you want to see more of their work, take a look at our library of case studies.

Download our e-book today to find out why the industry is moving away from surface-applied concrete hardeners.

The post How Combining Concrete Admixtures Simplified Aquatera’s Expansion appeared first on Kryton.

What can Precast Concrete be Used For?

What can Precast Concrete be Used For?

Known for its immense strength, durability, and endurance, concrete is the number one building material in the world. It’s been used for centuries and can last for thousands of years.

There are several different types of concrete, but today we’re going to take a look at precast and its many uses. 

What is precast concrete?

Precast concrete is formed using a mold and is often used to create columns, beams, or parking curbs. It can be produced in mass quantities due to specifications and codes that are already established. This building process is extremely efficient, allowing for hundreds of large structures to be built in just a few weeks.

The purpose of precast and its many uses

Precast concrete is built above the ground and can be used to stabilize large pieces of earth or hold back dirt. This makes it a great choice for building large retaining walls or smaller retention ponds. 

Three-sided bridges and box culverts for marshland and stream crossings also call for precast concrete. A strong material is particularly essential for structures like these. Otherwise, traveling over this type of land would be impossible without damaging the environment. 

In certain cases, custom pieces can even be made to meet your unique needs; for example, creating a vault using more than one piece when preexisting blockages are in the way. In these circumstances, individual precast panels are constructed and the vaults are then pieced together in place. Other custom examples may include railroad crossings or boat ramps.

Precast concrete is also used to construct buried infrastructure like catch basins, manholes, and vaults. These structures can be used to house telecommunication or electrical junction boxes, move storm water or sewage, and retain water.

Understanding the benefits

One of the biggest perks of precast concrete is that it’s ready to install when you are. This is one of the main shortcomings of site-casted concrete, because weather can delay the pour. Because precast concrete is created within a controlled environment, this is not an issue.

Another major benefit is the fact that strength-testing has already occurred before delivery day. Site-casted concrete, however, requires extra time and effort on the day of the pour to add rebar, set forms, and monitor the product.

When it comes to the production of precast concrete, the process alone is extremely sustainable. At Port Aggregates, all of our concrete products are made with the highest quality materials. It’s why we’ve been trusted for over 40 years! Contact us today to request a quote

The post What can Precast Concrete be Used For? appeared first on Port Aggregates.

How to Remove Stains From Concrete Flooring

How to Remove Stains From Concrete Flooring

One of the biggest concerns that people have when it comes to concrete flooring is how to clean it efficiently.

Fortunately, removing stains from a concrete floor is not nearly as difficult or complicated as it sounds. 

Here are a few stain removal tricks to help you maintain spectacular looking concrete floors.

Removing paint stains

Timing is everything when it comes to a paint stain on concrete flooring. For the best results, it’s critical to act as quickly as possible. 

For a fresh spill, start by putting on goggles for eye protection, then mix together one cup of trisodium phosphate (TSP) with four liters of hot water. Pour the mixture over the paint, scrub it with a long brush, and pressure rinse it until the stain is removed. 

Unfortunately, if you’re dealing with a very large spill, there may always be a slight hint of color left on the concrete.

Removing oil

Oil stains are some of the ugliest, most stubborn stains out there. If possible, try to absorb the oil as soon as you notice it so that it doesn’t penetrate into the concrete. 

Believe it or not, your best bet against a fresh oil stain is to pour cat litter or mud over it, then scrub with a stiff brush or broom. Leave the cat litter or mud on top of the stain for at least an hour before sweeping it away. For tougher stains, leave it overnight.

If this doesn’t completely do the trick, mix together one cup of TSP with hot water, then pour this on top of the stain. Let it sit for at least 30 minutes before scrubbing with a rigid nylon brush and hosing it off with pressurized water. 

Removing mud

When mud is left for too long on concrete flooring, it can leave an ugly brown stain. Fortunately, this is one of the easiest stains to remove. Simply mix together some dishwashing detergent and warm water into a spray bottle, shake it, and squirt it over the stain. Let it sit for around 10 minutes, then scrub it off with a nylon brush and rinse with a high-pressure hose.

Removing rust stains

Unfortunately, rust stains on concrete are quite difficult to remove entirely. Large, old rust stains often require a special rust remover. But for smaller, newer rust stains, using vinegar is your best bet. 

Just pour it on the stain, let it sit for at least 10 minutes before scrubbing with a nylon brush, and its acidic properties will eat away the rust. Rinsing and repeating may be required. 

Looking for more tips on concrete and how to clean it? Check out the Port Aggregates blog

The post How to Remove Stains From Concrete Flooring appeared first on Port Aggregates.

Natural Wood Protection – Vol. 2

Natural Wood Protection – Vol. 2

Researching new methods of wood protection are of key importance for the work we do here at Critical Concrete. Wood is the primary material we use to build and renovate houses; from the structure, to the cladding, and the furniture. Priorities of our wood protection solutions include; relatively low-cost, accessible materials, simple recipes. Prioritising these aspects means it is easy to scale up for large projects. 

Tricoil

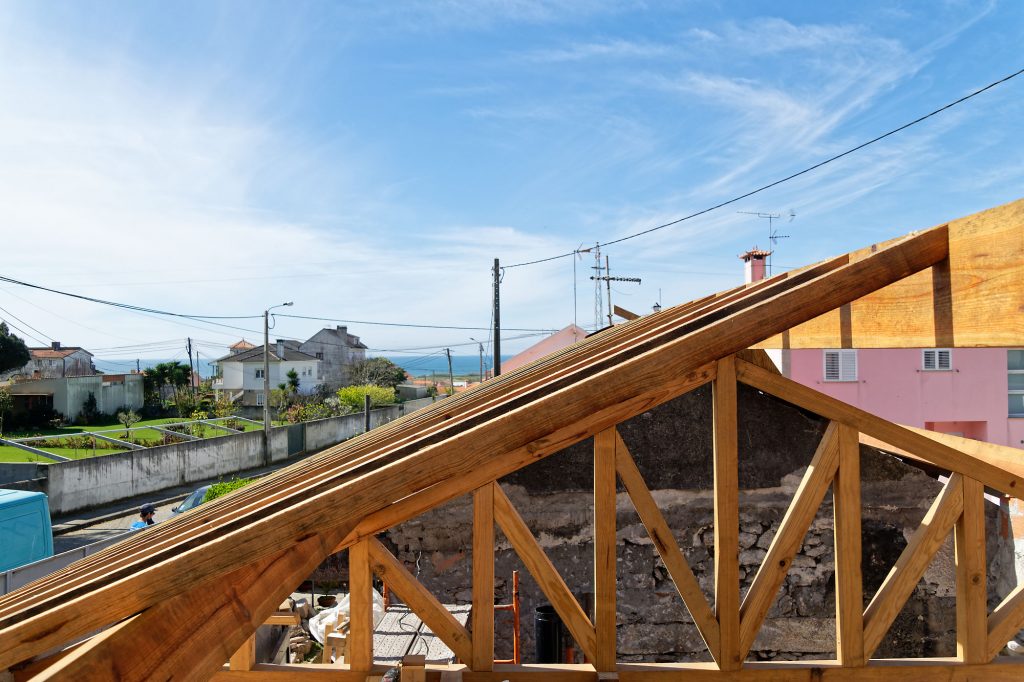
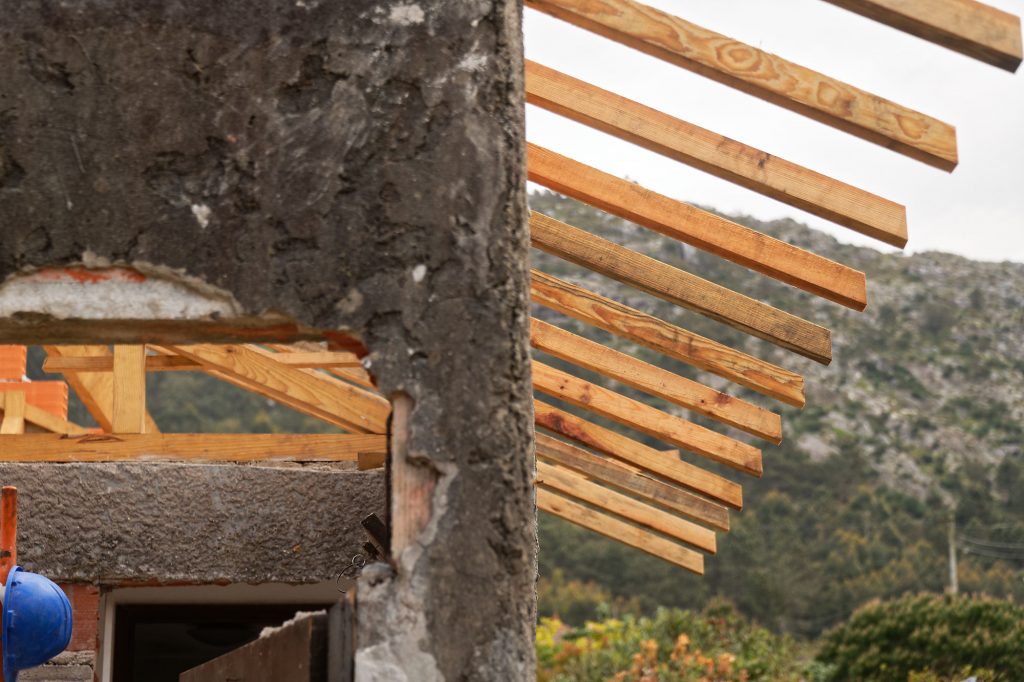
For our renovation project in Esposende, we rebuilt the roof with a wooden structure, so it was essential to protect the wood for the longevity of the building. With the cladding substructure, window lintel, and furniture we had a lot of wood to treat. Through research of various recipes we came up with a recipe and method which fit the requirements we had. 

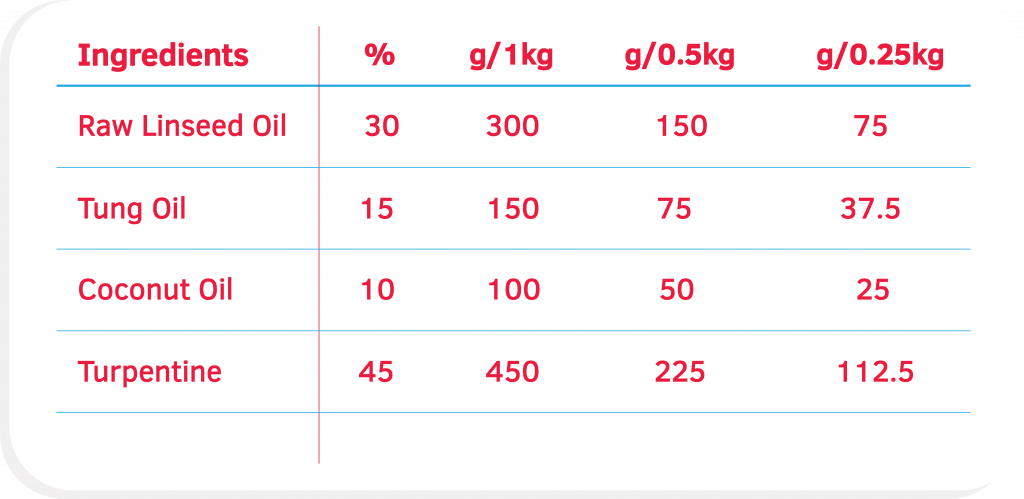
TRICOIL (Turpentine/Tung Raw Linseed I Coconut OIL or 3 oil) is a blend of three different oils which gives protection from parasites and environmental conditions. Linseed oil, Tung oil, and Coconut oil are blended together using turpentine as a solvent to combine the oils and allow for deeper penetration of tricoil into the wood. The original recipe and method we based this upon can be found here [1]. 

Tung oil has been used by the Chinese for hundreds of years to protect wooden boats. It is derived from pressing the nuts of the Tung tree. It has anti-termitic properties and offers durable waterproofing. 

Raw Linseed oil, obtained from pressing flax seeds, creates a water repellent barrier on the wood.

Coconut oil, rich in fatty acids, nourishes and protects the wood. 

Turpentine, a solvent derived from tree resin, thins and blends the oils for easy application to the wood. 

Method


Ratio of ingredients for TRICOIL

Heat a large pot of water to 50°C to act as a bain-marie. Place a jar of coconut oil and turpentine into the bain-marie and cook until this mixture has also reached 50°C, stir often. If you have a big enough pot, you can do the same with the linseed oil and tung oil together in one jar, placed in the bain-marie. Once the mixtures have reached the temperature, mix them together.
The Tricoil is now ready to be applied on clean, sanded wood. Apply to the wood once per day for 3-4 days and dry in an open space. 

Burning Station

Since discovering the wonders of Yakisugi, it has become a firm favourite as a method of protecting wood in many of our projects. Our first article in wood protection dives into the science of the method and the properties of charred wood. 

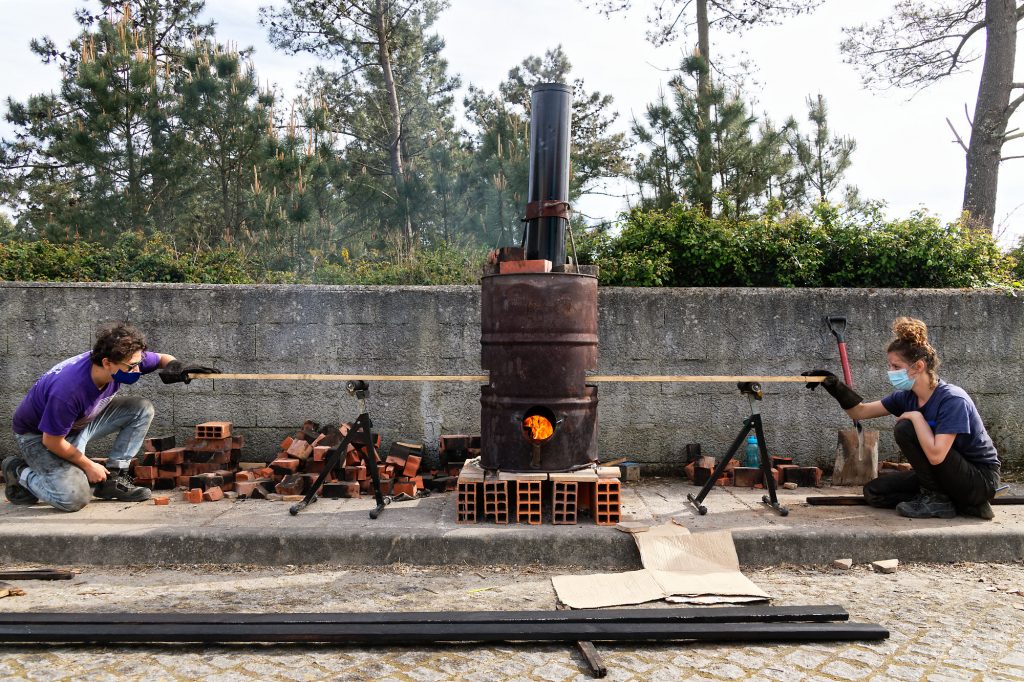
After a fair few projects using our brick burning station at CC HQ, we enlisted it for charring wood for the cladding of the Esposende house. Around a half ton of bricks were put in the van and rebuilt on the street. After so many uses at such high temperatures the normal bricks and even special fire-bricks began to crack and posed a risk of collapse while using the stove. Thus we decided to design a new, super-portable, efficient charring station. 


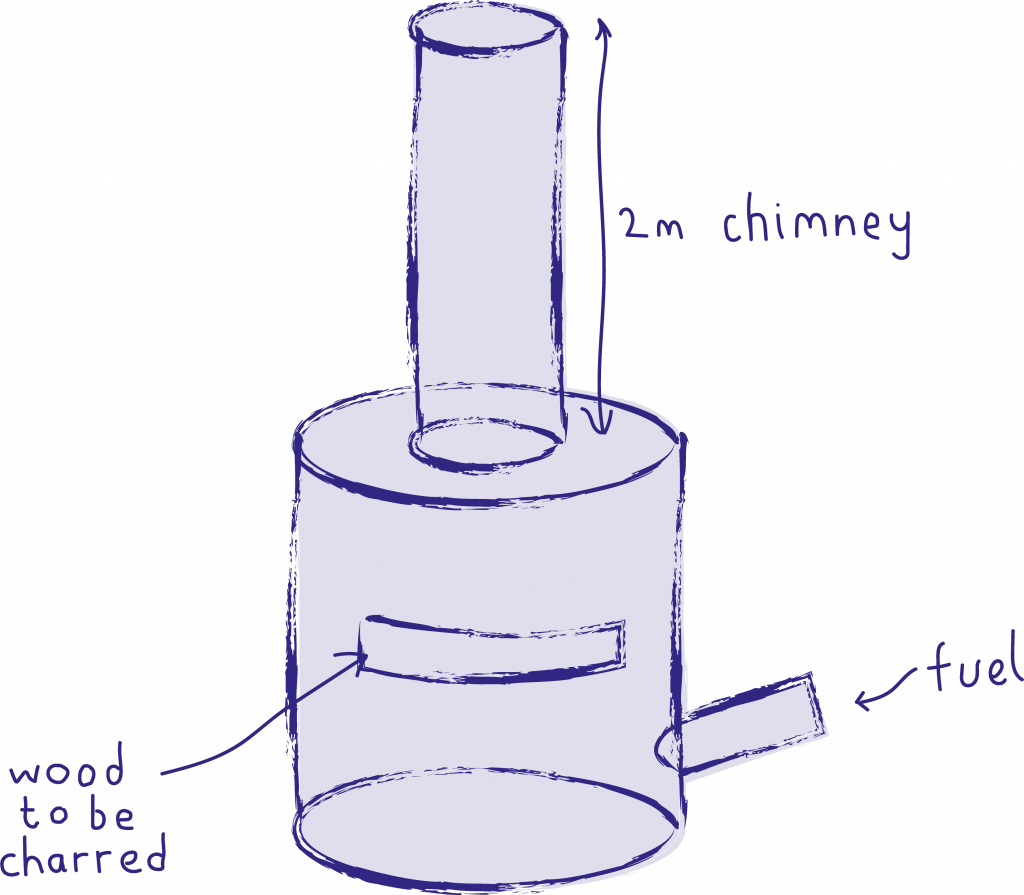
Blueprint of the new charring station

The body of the charring station consists of an old oil drum, an inlet for passing the wood to be treated through, a feeder for fuel, and a hole to attach a chimney. It mimics the previous charring station with the L shape encouraging an upward draft. The feeder is made of an old fire extinguisher welded on with extra metal for support. 

With the use of two rollers, 1 person can manage the charring station themselves. If the fire is burning well and frequently stocked, it is possible to char a 3m 30x3cm board in 10-15 minutes for both sides. 

The efficiency and speed of this burning station allowed us to burn all the wood for the board and batten cladding of the house in Esposende. Furthermore, this higher degree of flame control allowed us to achieve a uniform result for the boards to not warp and lose their integrity. 

For improvements of the burning station we would advise a metal plate on the lip of the openings for the board to rest on – otherwise it can mark the board. Additionally, a way to adjust the opening for different sizes of boards would increase the efficiency by reducing excess draft. 

Top Tips

Have an ample supply of fuel available to keep the fire well stocked and at a medium-high flame.If the flame is burning too high it is better to do a few quick passes to avoid over-charring the wood which can result in warping.Apply raw linseed oil after charring to compensate for loss of moisture and flexibility.If the wood does warp and you are using it for board and batten cladding, mount the board with the bend curving away from the wall to reduce pressure and prevent cracking. 

There are a few drawbacks of this method and these should be considered before employing this technique in your own projects. One is the time intensive nature of the process. The burning station was fired up most days of the 6 weeks of Esposende workshop. This works if there are many hands available to take on the relatively low-skill task and take turns amongst each other. However it may prove tiresome for a self-build project. The second drawback is the issue of smoke. At Critical Concrete HQ we have neighbours in close proximity, requiring us to build an extra tall chimney to prevent smoking out the neighbours. Having ample space is also a factor to consider. The actual working site of Esposende was relatively small, however, we were lucky to be able to use the quiet street, much to the amusement of the neighbours! Looking to our next renovation project we will need to contain construction activities as much as possible as the street is very narrow with no pavement. For situations when these drawbacks are apparent we endeavour to find more suitable solutions. 


New burning station

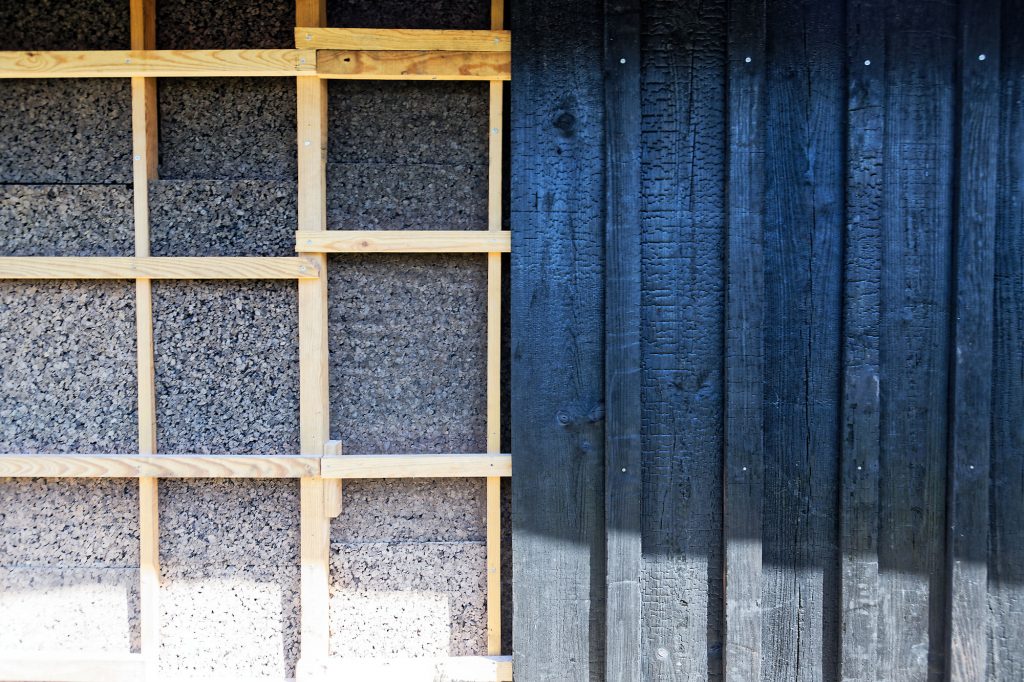
Yakisugi cladding on wooden substructure treated with TRICOIL

Swedish Paint / Flour Paint

Filling the requirements of cheap, scalable, non-toxic and accessible ingredients, Swedish Paint is an excellent choice. Swedish paint has long been used as the primary choice for wood protection in many Nordic countries. It can endure the harsh climate while offering an appealing aesthetic. 


Swedish Paint can last for up to a decade before a new application is needed.
Photo by Anders Nord

Method

This is a new method for us and we have tried out one recipe using the materials we had available in the workshop [2].

For 3 litres of paint the following measurements can be used:

300g of flour3l of water600g of pigment300ml of linseed oil

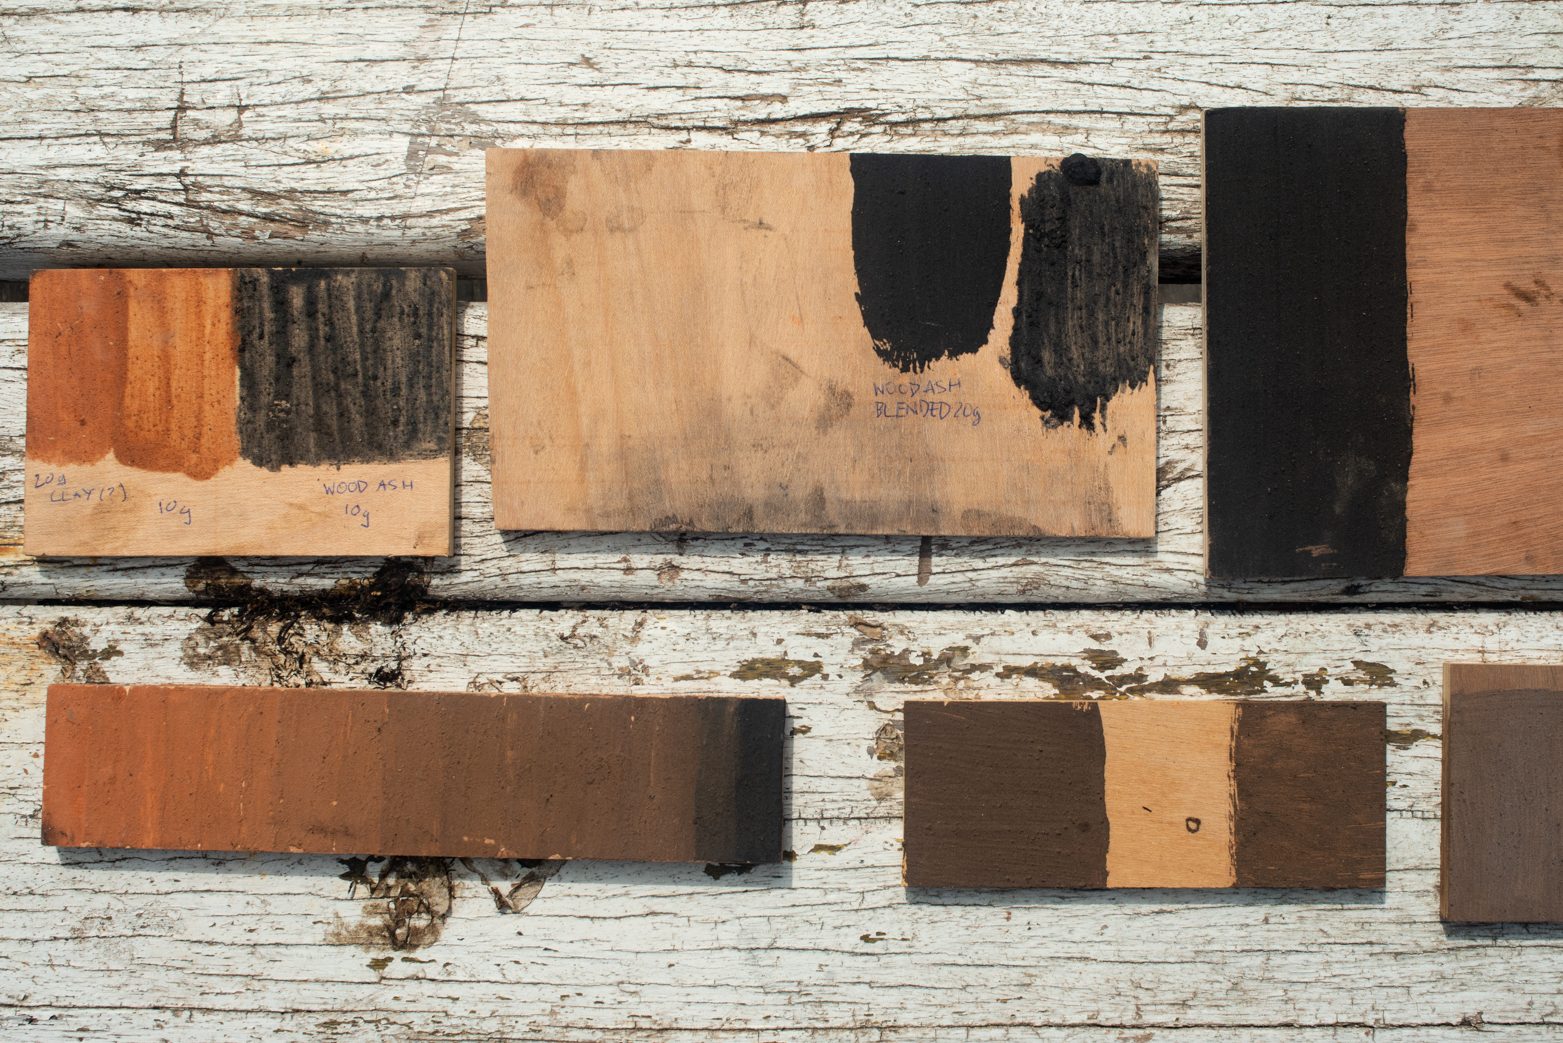
For pigment, we used red clay that we had left over from making a rammed earth floor and wood ash from a local saw mill. There are many options for pigment, do some research and see what is available in your local area. 

This is the very beginning of our research with Swedish paint so there will be more information to come in the future as we experiment with different recipes and ingredients. We will leave these samples outside to see how they withstand the weather.


Paint samples using wood ash and clay

References

[1] ​​https://www.artamin.it/impregnante-ad-olio-fatto-in-casa/

[2] https://engelleben-free-fr.translate.goog/index.php/recette-de-la-peinture-a-la-farine-protection-des-bois-exterieurs?_x_tr_sl=auto&_x_tr_tl=en&_x_tr_hl=en&_x_tr_pto=ajax,elem&_x_tr_sch=http

The post Natural Wood Protection – Vol. 2 first appeared on Critical Concrete.
Did you miss our previous article…
https://cedarparkconcrete.org/?p=155

5 Benefits of Using Precast Concrete in Large Scale Projects

5 Benefits of Using Precast Concrete in Large Scale Projects

Precast concrete is one of the most popular construction materials used in large-scale construction projects. 

It’s durable, comes in any desired shade or color, and can be manufactured into virtually any shape. 

But the benefits don’t stop there. 

There are several other advantages of this special type of concrete, including: 

1. Longer shelf life than other types of concrete

Precast concrete has a longer shelf life than other types of concrete like traditional ready mix

This is because precast concrete is mixed, poured into molds, and allowed to dry inside the mold before transporting. 

The longer it stays fresh and dry before being used in your project, the longer it will remain strong and beautiful.

2. Low maintenance costs

Precast concrete structures are generally easy to clean. 

This is because they don’t have the same porous issues that other types of construction materials might experience when exposed to water or weathering over time.

Concrete’s smooth, solid surface doesn’t hold onto dirt and grime like sandstone or brick pavers do for instance, so it’s easier to keep clean. 

As a result, you won’t have to worry about spending money on labor costs for ongoing cleaning projects or hiring a professional company every year.

3. Reusability for future projects

Although precast concrete is extremely durable and long-lasting, there are certain companies that can take it apart or break it down if needed. 

This allows you to save money by reusing the material for future construction projects.

When working on a large-scale project, this can significantly lighten your financial burden. 

Precast concrete can be repurposed into a variety of different forms when designing large-scale projects, including piers, columns, structural frames for buildings, and beams. 

You’ll have the ability to customize your project based on your specific needs or desired aesthetics in order to achieve that perfect look with precast concrete components.

4. Sustainability

Using eco-friendly, recyclable construction materials like precast concrete is a great way to be more sustainable. 

Because it’s easier on the environment, it will result in lower levels of pollution over time. This helps benefit everyone involved, including people who live or work near your building site.

5. High quality

One thing you’ll notice about using precast concrete from Port Aggregates is its high quality.

Because it’s durable and long-lasting, it can be used for a variety of different purposes, withstanding harsh weather in any environment. 

Along with its high quality, precast concrete is also very cost effective and its design can be customized based on your specific needs or desired aesthetics. 

At Port Aggregates, all of our concrete products are made with the highest quality materials. It’s why we’ve been trusted for over 40 years! Contact us today to request a quote for your next large scale project.

The post 5 Benefits of Using Precast Concrete in Large Scale Projects appeared first on Port Aggregates.