How to Mix Concrete by Hand or in a Mixer

How to Mix Concrete by Hand or in a Mixer

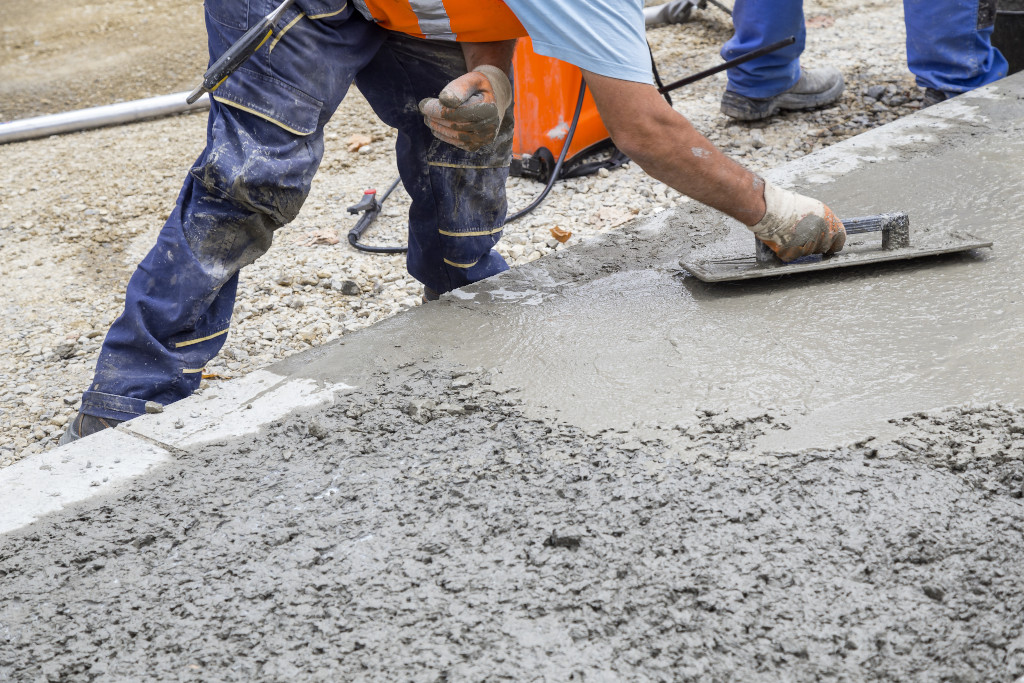
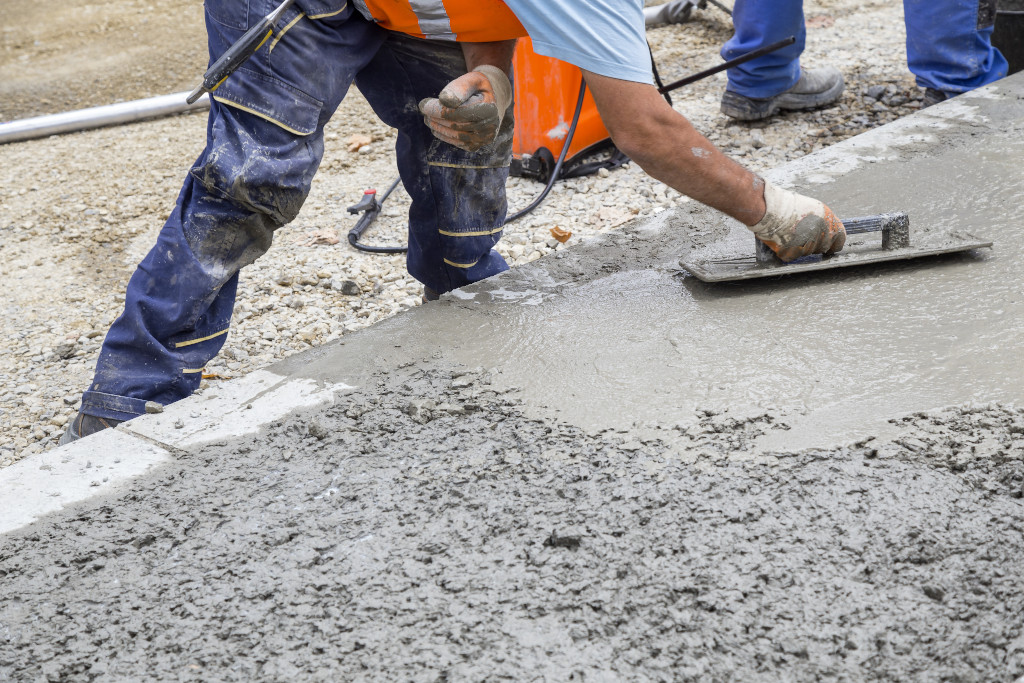
Lots of people fear using concrete. If it goes wrong, it can be difficult to fix, but for smaller domestic jobs it’s actually a lot easier than many people think. With this guide, we’ll go over the different ways to mix concrete so you can decide what’s best for you when attempting your DIY project.

Concrete Proportions

Concrete has 3 main ingredients. Cement, aggregate, and sand. These ingredients are mixed with water, which when dried out, binds into a solid, very hard material. Depending on what you’re using the concrete for, these can be mixed in different proportions to give you different finishes and strengths.

It’s very important to get these proportions correct. With too much sand, your concrete won’t be hard enough to withstand the test of time. However, too much aggregate and you’ll be rushing to find a way to cover it up and pretend that it isn’t there.

Mixing Methods

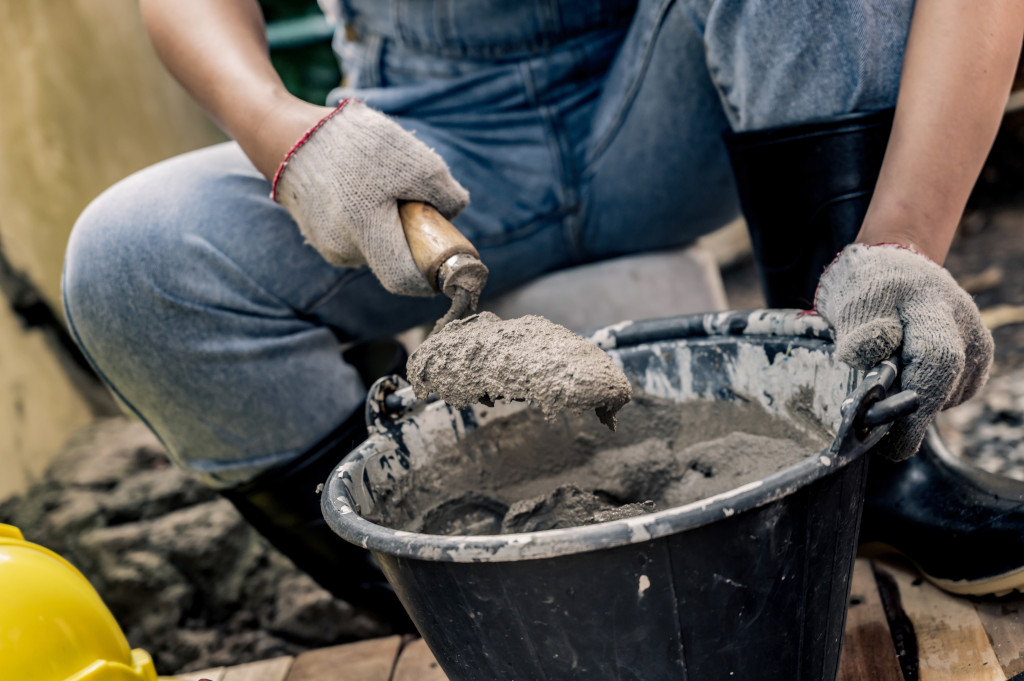
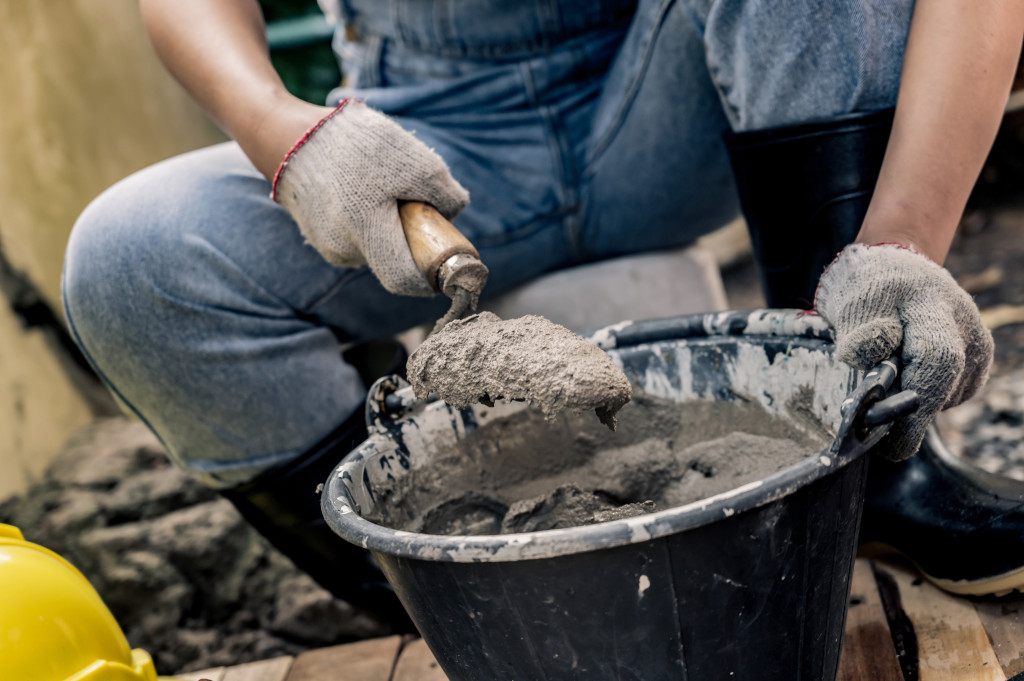
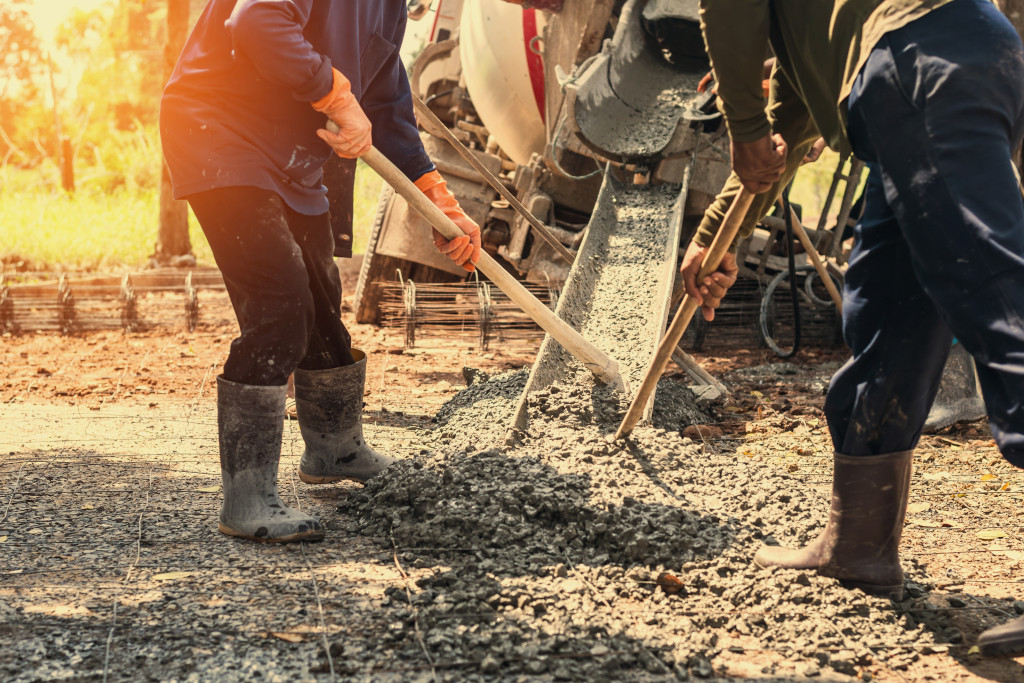
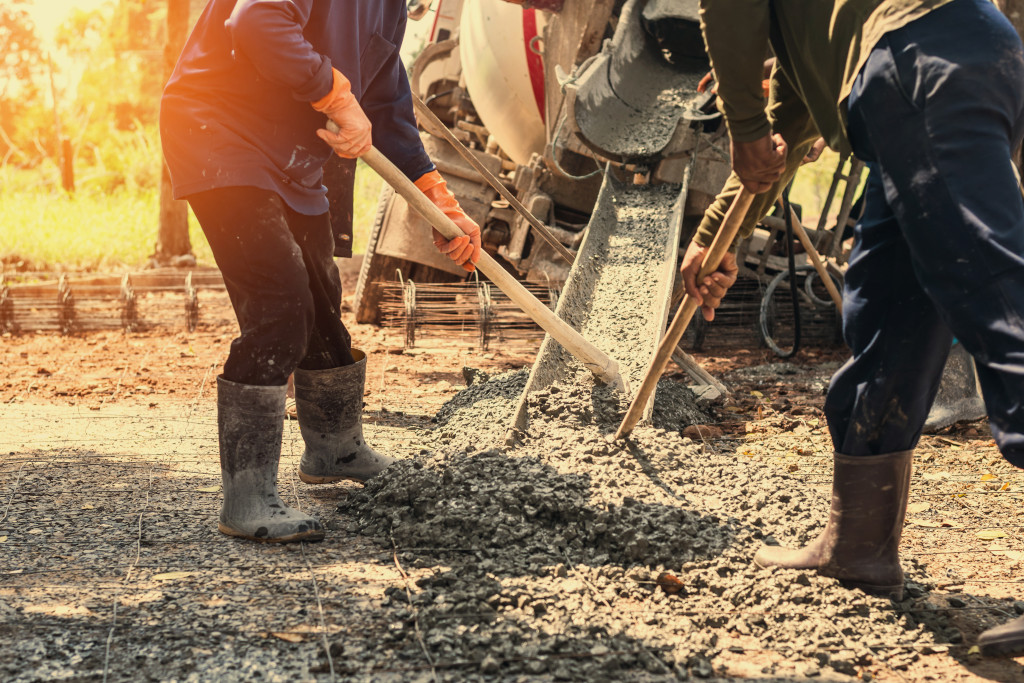
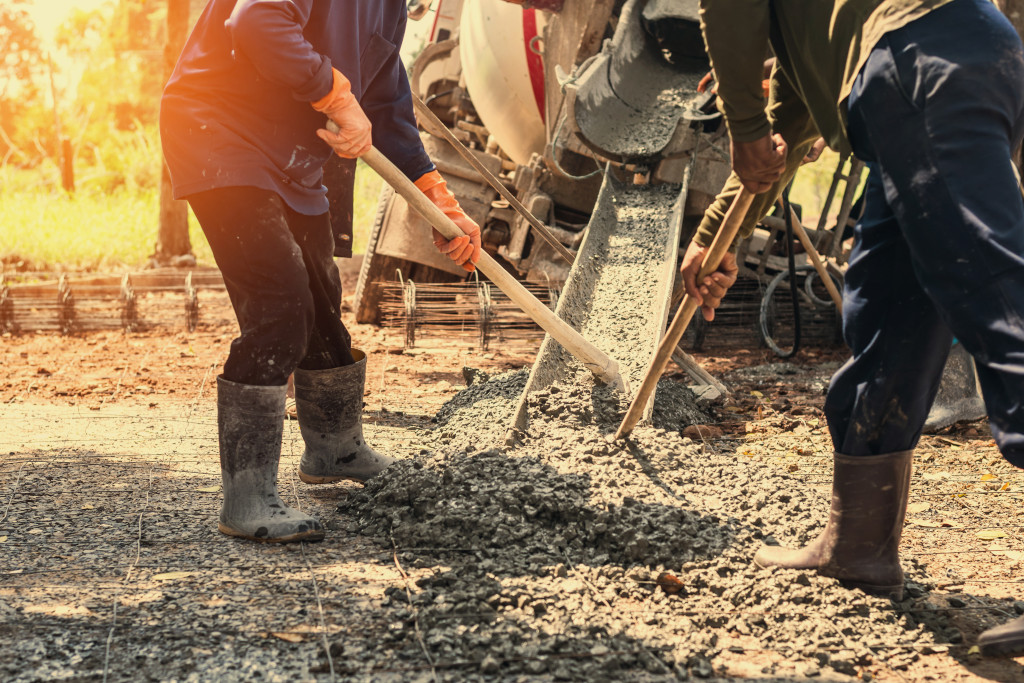
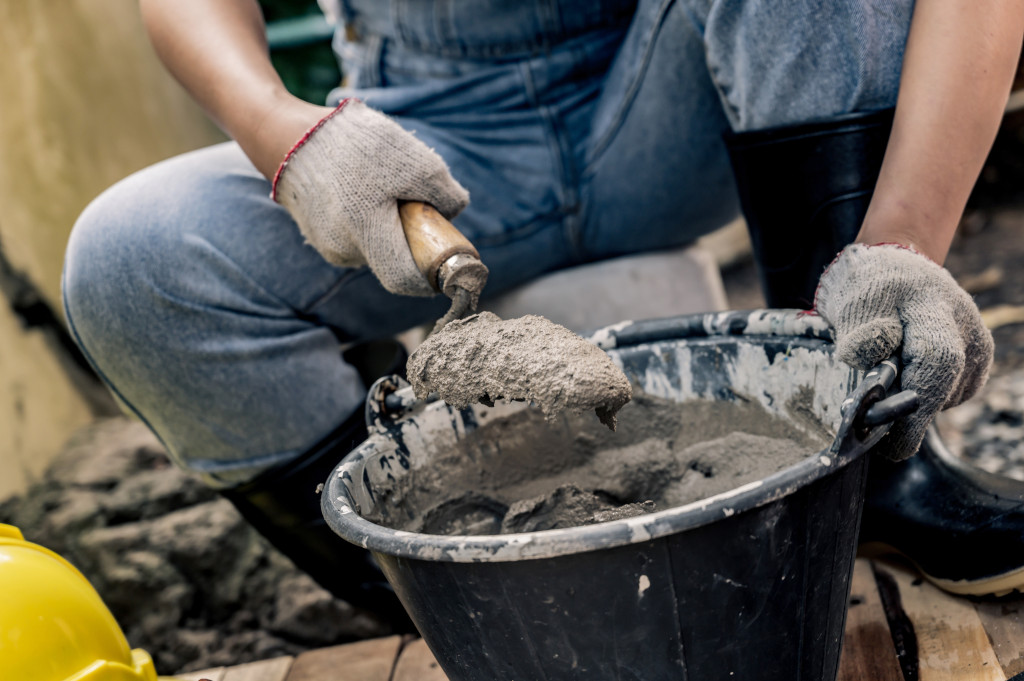
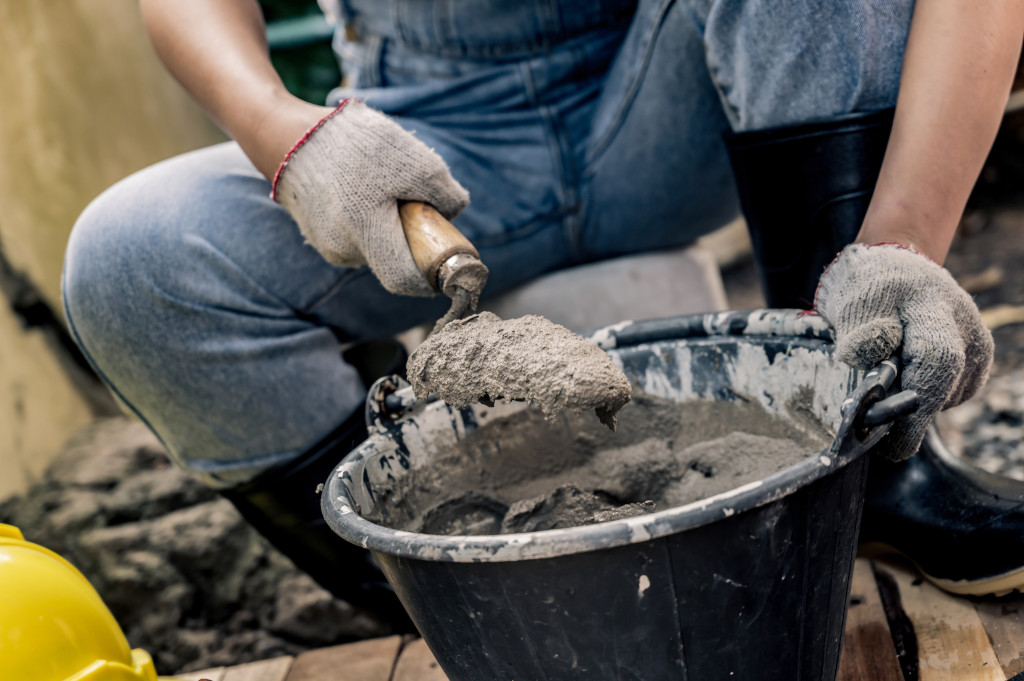
In a domestic setting, there are several different approaches you can take to mix your concrete. If you’re happy giving the different proportions a go, you can either do this by hand or by using a mixer. For small scale jobs, mixing by hand can be ideal as it’s easy to keep track of the consistency and see how it’s going. This can often be a good thing to do as a practice if this is your first time. For larger jobs, a concrete mixer can save you hours of time and strength mixing larger amounts of concrete together.

When it comes to domestic concrete, it’s often overlooked that there are some other options also available to you, especially for slightly larger jobs such as concrete bases for sheds, summerhouses and other garden accessories. The main differences between domestic and commercial worksites are space. Often with a commercial worksite, the work will be planned to make these processes as efficient as possible, allowing the concrete mixers to reverse right up to where they’re going. However, this doesn’t mean you can’t utilise similar methods.

Types of Concrete Mixers

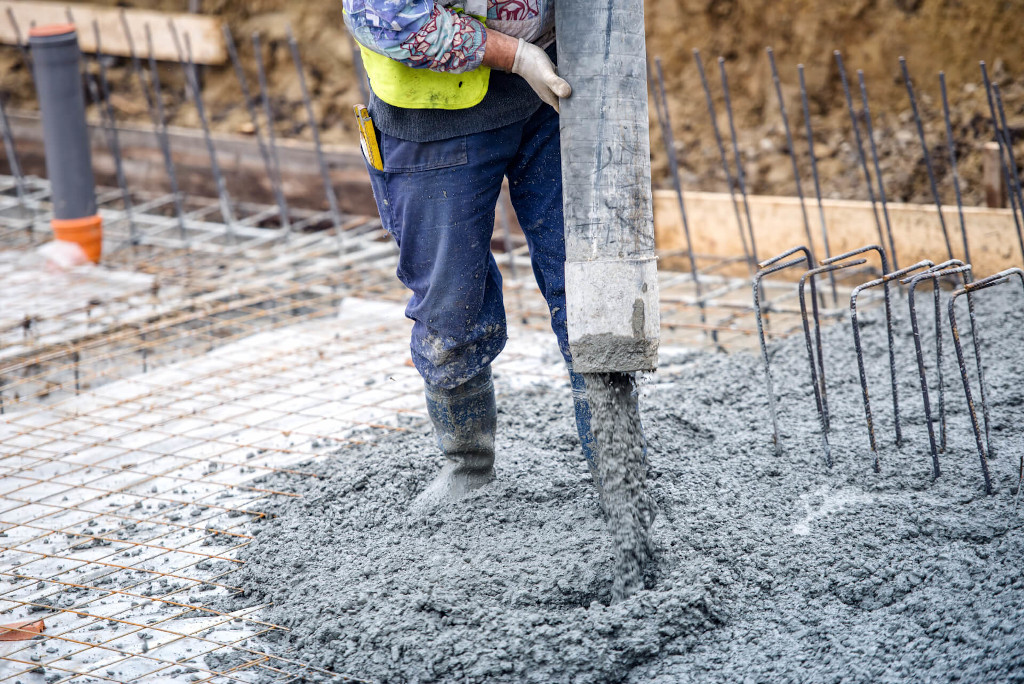
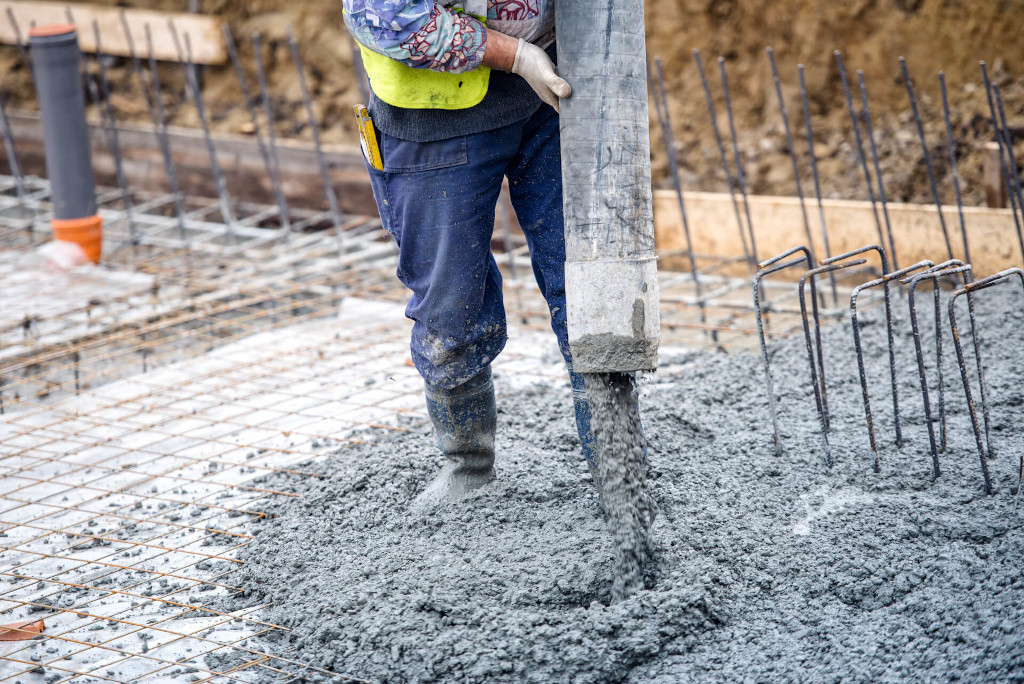
There are two main different types of concrete mixer. There are ordinary concrete mixers and also volumetric concrete mixers and both of these have different uses. You’ll likely have seen ordinary concrete mixers or mini mixers driving around quite frequently. These have the advantage of being able to transport one of many different mixes of concrete. Extra ingredients can be added to the concrete at the factory in order to provide different properties such as waterproofing or extra fibres for additional strength. However, this isn’t often needed when it comes to domestic concrete.

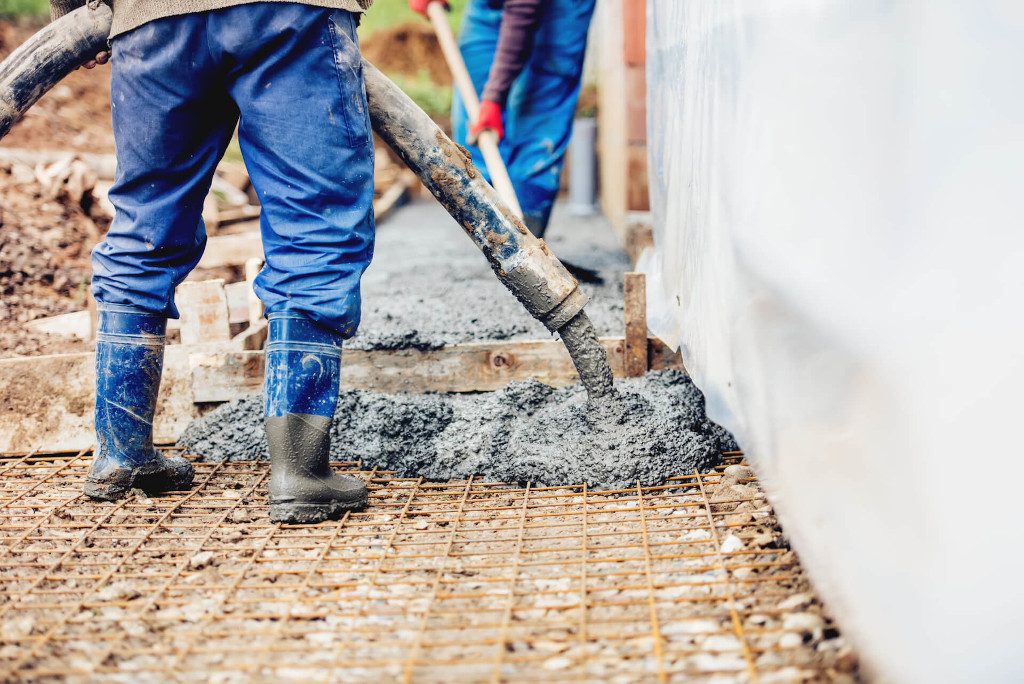
The other type of concrete mixer is a volumetric concrete mixer. These are ideal for domestic concrete as you don’t need to worry about having too little or too much. ‘Mix as you go’ concrete mixers contain the raw ingredients needed and as you pour out the concrete will mix it straight away. They also have the added advantage over traditional concrete mixers of being able to supply multiple different mixes of concrete to the same job without having to pay the additional cost of bringing in a second load.

Concrete mixers and volumetric concrete mixers are also a great choice for people taking on DIY projects that don’t want to take the risk of getting the mix wrong. All you’ve got to worry about is where it goes with the extra guarantee of knowing that it will stand the test of time. Thank you for reading this blog post. Should you have any enquiries, feel free to call us on 07812 182778 or visit our contact page for more information.

The post How to Mix Concrete by Hand or in a Mixer first appeared on Base Concrete.

Benefits of Onsite Mixed Concrete

Benefits of Onsite Mixed Concrete

While you’re in the planning stages of your latest project, have you considered the benefits of onsite mixed concrete? If not, let us explain!

Budget

One of the great benefits is the amount of control that you have if you opt to use on-site mixed concrete. You see with this method you will receive the exact amount and mix of concrete that you require. As a result, you are controlling your budget by only paying for the amount you use. It avoids having loads of unused concrete hanging about!

Consistency of Concrete

Using mixed on-site concrete supply allows you more control over the consistency of the concrete. This is because, with the volumetric mixers that will be used, the materials that go into the concrete are kept separate until the batching process. This will mean you would be able to pick an exact consistency that would suit your needs.


Say, for some reason the consistency required changed halfway through the project, have no fear, as it’s on-site, this can still be altered! The great thing is the logistical advantage-you have when the concrete is delivered directly to your site. You will find that many companies offer next or even same-day delivery.

Fresh Concrete

That points us to another mixed concrete benefit. If you have the supply on-site, you’re providing your team with access to constant fresh concrete. When it comes to the pouring, it is always fresh. There are times when a delay may hit your project but that cannot be helped, and the fact you can keep the concrete fresh is a massive bonus.


Do note that if traditional drum mixers are being used, these can be impacted by delays because of their need to transport pre-mixed concrete in a drum from the yard to a site, meaning there is a chance it could go off. But with a mixed onsite service, there will be the option to change or extend the order on the spot, because the concrete providers will be able to produce the exact type of concrete needed-fresh!

Reduced Waste 

Keeping with the notion of how much more control you have with this concrete set up when it comes to on-site mixed concrete it is easier to scale your needs in relation to project size. Working on a very large site? You would benefit from volumetric mixers as these can hold up to twice the amount of the traditional drum mixers. Or perhaps it’s more of a smaller project? Likewise, on a small site, the mixers can produce smaller volumes with ease. This helps you to have the amounts you need and cut down on waste in the process.

Regarding quality, all the best onsite mixed concrete services will make sure to be providing you with concrete that is made from only the finest materials. Also, keep in mind you will be able to have the mix tailored to suit your needs, so if you require a tougher mix that can be made up or something more workable can also easily be fixed up, no issues.


If you agree that onsite mixed concrete is the way to go for your project, Base Concrete can help. Thank you for reading this blog post. If you are looking for anything to do with concrete, Base Concrete has you covered. Call today on 01442 389105 or visit our contact page for more details.

The post Benefits of Onsite Mixed Concrete first appeared on Base Concrete.

Top Tips To Sealing A Concrete Floor

Top Tips To Sealing A Concrete Floor

How To Seal A Concrete Floor?

Using concrete flooring in your home can be an excellent choice. Especially if you’re interested in the durability of your floor. However, to make a concrete floor last it’s important to seal it properly since concrete is porous.

Sealing a concrete floor is an effective way to keep your floor free of stains from substances such as grease, oil, water, and others. As if that’s not enough, sealed floors look beautiful and are easier to clean.

To ensure that the sealer is effective, however, the application process has to be done properly. Everything you do, from surface preparation to picking the right application tool, will go a long way towards determining the final outcome. 

How To Go About Sealing A Concrete Floor 

Here’s a quick summary of what you should do when sealing a concrete floor

Clean the floor (remove stains, dust, oil, etc. from the concrete)  Remove any old sealer from the floor Use an etching solution to open up the concrete Use a sprayer or roller to apply the first thin coat of sealer  After the first layer has dried, apply a second coat of sealer in the opposite direction Leave the sealer on the concrete until it dries fully (avoid driving or walking on the concrete until it’s dry) 

Cleaning the floor

To avoid inconvenience, you should remove the furniture and everything else from the room. Keep in mind that you will need somewhere to store the items for no less than one week. Once the room is clear, sweep it thoroughly, and then proceed to clean any area that is still dirty. 

You can use mineral spirits to clean grease spills. Once the floor looks clean, use a concrete cleaner to ready the floor for sealing. Rinse the cleaner off, and then wait for the floor to dry. At this point, you can use a concrete repair caulk to fill any visible cracks. Then finally, wait until the caulking has dried completely.

Removing the old sealer

If the floor had an old sealant, you have to wait before applying the new sealant. If you’re not sure whether a sealant was used on your floor or not, you can use water to test this. To do this pour approximately one cup of water on the concrete.

If the water does not soak into the floor but instead beads up and remains on the surface, the floor had been sealed. If the floor had not been sealed, the water would soak into the floor. To remove the sealant, you can use a chemical stripper.

Since chemical strippers are acid-based, be sure to protect yourself when removing the sealant. After removing the sealant, you’ll have to let the floor dry for at least 24 hours before proceeding.

Choosing the sealer

There are four main types of sealers to choose from:

•   Acrylic sealers 

This kind of sealer sits on top of the floor and is mainly used to seal interior floors. Acrylic sealers are easy to apply, but they don’t protect the floor effectively against grease and oil stains when compared to other sealers.

•   Epoxy sealers 

Despite being more durable compared to acrylic sealers, this type of sealer also sits on top of the concrete. Epoxy sealers protect your floor effectively against grease stains, but they are difficult to apply. They are also available in various colors enabling you to change the look of your floor.

•   Polyurethane sealers 

This type is mainly meant for use over other types of sealers. Polyurethane sealers have UV protection, which keeps them from turning yellow over time. They also sit on top of the concrete, but the layer is usually thinner.

For this reason, polyurethane sealers are mainly applied over epoxy as the top layer. The sealers are available in semi-gloss, matte, and glossy finishes. Such sealers are typically fine when used over other sealers, but if you’re not sure, you can always get some clarification from the shop you are buying from.

•   Silane/siloxane sealers 

You can use this type of sealer if you don’t want to change the look of your floor. Since the sealers penetrate the concrete, it won’t become glossy or darker. It will retain the matte grey color. This kind of sealer lasts 20 years or more and is effective in protecting the floor against stains and deterioration.

pplying the sealant

Here’s what you should do when applying the sealant:

1. Carefully read and understand the instructions

Every sealant is a tad different from the other. For that reason, you should read the manufacturer’s instructions to attain quality results for your project. Be sure to pay attention to important details such as the most appropriate temperature and humidity recommendations for application.

2. Ventilate the room

In whatever room you’re working from, ensure that there is enough ventilation by opening the windows and doors where applicable. You can also use an outside-facing fan to facilitate the movement of air from the room to the outside area.

3. If using an epoxy sealant, mix the two parts together

Epoxy sealants come in two different containers whose content should be mixed before application. In such a case, you should pour the content of the smaller container into the bigger one and then use a stir stick to mix them thoroughly.

You should mix them only if you’re ready to start the application process. It’s also important to note that you’ll have a period of one hour or so to get the epoxy down. For that reason, you have to be quick when working.

4. Divide the room into smaller sections 

It’s recommended that you divide the room into four sections for ease of application. You should start with the least accessible section, and work your way out to the door so that you won’t have to walk on the wet sealant.

5. Use a small paintbrush when sealing the edges of the floor

Get a paintbrush that is 5.1 to 7.6 cm wides and use it to apply the sealer along the edges of the concrete floor where the paint pad or rolling brush may not reach. Be sure to use nice, even strokes when applying the sealer.

6. Apply the sealer using a rolling brush or paint pad 

Pour some sealant into a painting tray and then dip a roller brush or a paint pad into the paint. If using a roller brush, be sure to roll the brush evenly in the paint. Use the roller brush or paint pad to apply a thin coat of the sealer along the edge that you’ve already painted.

Continue applying the sealer across the floor until you’ve covered the entire floor. When applying the sealer, you should ensure that there is always a wet edge to carry on from. The reason for doing so is to achieve a uniform look on the floor. 

Since you’ve already divided the room into smaller sections, you can work on each one of them at its own time. As you apply the sealer, make sure that you spread it evenly across the floor. You should also keep track of your area of coverage to avoid ending up with some patches that haven’t been sealed.

7. Apply a second coat 

For a smooth and even finish, you should apply a second thin coat. To ensure better coverage of the sealant across the floor, you should apply the second coat at right angles to the first one. Let the sealer dry as per the time recommended by the manufacturer on the sealant can, before walking or driving on the concrete. You should be ready to wait for up to four days to allow the sealant to dry completely.

Final thought, 

Sealing your concrete floors is a foolproof way to increase their lifespan while also enhancing their beauty. The good thing is that you can easily complete a floor sealing project by yourself. If, however, you’re not particularly confident with your DIY skills, you should hire an expert.

If any of our high-quality services interest you, give us a call on 01442 389105 or 07812 182778 today. Or fill out the enquiry form on our contact page for more information.

The post Top Tips To Sealing A Concrete Floor first appeared on Base Concrete.

How To Lay A Concrete Base

How To Lay A Concrete Base

Follow these steps for the best DIY project

If you are going to be laying a concrete floor for a DIY project it is important that careful preparation is made and each recommended step is followed. You may want to consider hiring a professional to do the work for you. Or at least certain parts. Perhaps the messier steps! Let’s take a look at how to lay a concrete base with this handy guide:

Mark Out Required Area

The first step is to mark out the required area for your concrete base, this can be done using pegs and string. And will need to be 100% accurate. So, make sure all sides are straight.

Dig Out The Area

Next, it is time to dig out the area you have just measured. Dig the ground in the marked area to around 175mm deep for a smaller shed or 225mm for a larger one. As you are going to need a level base it is a good idea to keep the depth you are digging as consistent as you can. Afterwards, remove the pegs.

dd Crushed Stone To Dust

For this step, you will need an MOT type 1 stone, this is crushed stone from 40mm to dust or gravel. Shovel into the space a minimum thickness layer of 75mm to form a hard base for the concrete layer. The depth should be about 100mm for a shed and around 150mm for something larger like a summerhouse. 

Measure, Cut And Fit 100m Timber Rails

Now it’s time to measure and cut and fit 100mm timber rails to the base and make sure the framework is level. This step is to create a framework that offers a strong and stable edge to the concrete and to ensure it is level.

Spread Out Layer 

Spread out that layer of MOT stone or gravel. Then use either a manual earth rammer or powered wacker plate to compact it. This will help create a firm base for the concrete and stop it from cracking over time.

Mix The Concrete 

So, now it is time to mix the concrete. Spread it out evenly and level it off. After smoothing over, grab a stiff broom to lightly brush across the base helping to encourage a textured non-slip surface. 

Keep an eye on the weather forecast at all times. At this stage, if wet weather is forecast cover the base with polythene or a tarpaulin for 24 hours. If it’s hot weather instead then use sacking and keep it damp for a day otherwise the concrete could too dry quickly. This will result in shrinkage and even cracking. You then need to leave it for at least three days to cure.

Finishing Touches 

For finishing touches, look to see if your base is flush with the ground. If this is the case, you will have a space running around the edge of the concrete where the rails were. You can fill this with pea gravel, it will help drain away moisture from the concrete base. Now you just need to place on your base whatever your intended item was!

We hope that our blog has helped you understand how to lay a concrete base. If you have any questions please don’t hesitate to give us a call on 01442 389105 or alternatively head over to our contact page to fill in our online enquiry form. 

The post How To Lay A Concrete Base first appeared on Base Concrete.

Volumetric or Ready Mix

Volumetric or Ready Mix

What’s The Difference? 

Concrete is, without a doubt, one of the most common construction materials. This is because it can be used for a wide variety of projects. It is essentially a blend of water, Portland cement, and aggregates. The two basic types of concrete used in the construction industry are site-mixed concrete and ready-mix concrete. 

There are slight differences between these two types of concrete. It is important to be aware of the differences, even if they seem subtle to you, as doing so can make it easier to choose the right concrete for your project. Here are the major differences between site-mixed and ready-mix concrete:

Preparation 

One of the obvious differences between these two types of concrete is the way they are mixed. Ready-mix concrete is usually manufactured at a plant and delivered to the clients in a ready-to-use state. It’s typically sold by volume, which is measured in cubic meters. 

Site-mixed concrete, on the other hand, is prepared at the client’s construction location. The components are mixed in specific ratios to achieve different degrees of strength. When making this type of concrete, caution must be taken to avoid quality issues. 

Time

If you are working on a time-conscious project, it’s obvious that speed is important. In such a case, you should choose ready-mix concrete, as it’s easier to load and off-load, which may save you time.

Volumetric concrete is more time consuming to work with, as you have to pause part of the project while the mix is being created. 

Equipment

An important factor for any construction project is your equipment and where you can source what you need. Volumetric concrete requires the use of equipment such as batch mixers. Whereas, ready-mix concrete does not require the project owner to hire equipment, as the concrete is not made on-site.

Convenience

Ready-mix concrete is convenient for almost any kind of construction project, as it can be delivered to multiple sites within the project location. However, volumetric concrete has to be mixed as close as possible to the point of use to avoid contamination. 

Another major difference between ready-mix concrete and volumetric concrete is storage requirements. You will require controlled storage space for the materials used to make volumetric concrete. However, when using ready-mix concrete you won’t need any extra storage space. 

Quality

Ready-mix concrete has a better and more consistent quality when compared to site-mixed concrete. This is because ready-mix concrete is mixed in an automated and controlled environment. 

Material takeoff

The materials used to make site-mixed concrete have to be estimated individually and purchased separately. However, ready-mix concrete is simply calculated as a single item. 

Waste 

Working with site-mixed concrete causes material loss not only when the materials are being mixed but also during storage. Whereas, ready-mix concrete causes minimal waste on your site because the concrete is delivered in a ready-to-use state. 

Workforce

When working with ready-mix concrete, the only time you may require skilled labour is when pouring and compacting the concrete. However, you will require more man-hours when working with volumetric concrete.

In summary,  

Both types of concrete have some major differences. It is important to research which type of concrete is best for your construction project. Generally, ready-mix concrete is a better option as it can be used for a wider variety of projects.

if you have any questions make sure to contact us.

The post Volumetric or Ready Mix first appeared on Base Concrete.

Concrete Abrasion Resistance: The Bad, the Good, and the Better (Interview Part 1)

Concrete Abrasion Resistance: The Bad, the Good, and the Better (Interview Part 1)

When it comes to getting a durable concrete slab, a critical part of it involves keeping the concrete resistant to abrasion. Without that resistance, construction professionals will often encounter ruts, dips, potholes, or worse in the surface of their concrete. All of which can lead to safety hazards and operational inefficiencies.

Professionals usually try to counter this with conventional surface-applied concrete hardening solutions. But these aren’t reliably effective and come with a number of setbacks.

To look into why that is, we’ve decided to explore the bad, the good, and the better parts about concrete abrasion resistance. Helping us in this discovery are two of our Smart Concrete experts: Jeff Bowman, one of our technical directors, and John Andersen, our territory manager for Western Canada. To start, let’s dive into some of the negative aspects surrounding concrete abrasion resistance.

Thank you for joining us on the first part of this interview series. Let’s start by discussing what abrasion actually is and why it is an issue for concrete in the first place.

Jeff: Abrasion describes the steady loss of material from the concrete through some sort of mechanical action. It’s generally more of a surface phenomenon. So forces that are acting on the abrasion of concrete are usually going to be some sort of object that’s either rolling or sliding over the concrete. And this may also be combined with foreign particles trapped between those two phases that are also gouging and sliding through the concrete.

John: When we talk about the significance of that wear and tear on concrete, we typically think about just the cost of taking the building out of service and replacing the concrete. But there’s also a cost regarding safety. And it’s not just about the people tripping and falling and encountering all other hazards because of it. There’s also an issue of breathing in the concrete dust, the cost associated with keeping the facility and machinery clean, the cost to the equipment, and the reduced productivity due to the worn out concrete.

How exactly do construction professionals usually try to resolve this issue?

Jeff: Dry shake hardeners are quite a common product for this. I’m sure many people reading this now probably use or specify them.

But for anybody who’s not familiar with them, a dry shake hardener is some sort of blend of cement and possibly some other additives and an abrasion-resistant aggregate particle, such as aluminum oxide (also called emery). And these products get broadcast in a dry form overtop fresh concrete and then worked into the surface during the final finish.

Now, certainly, these products can work and can give you a good abrasion-resistant finish if they’re installed well. The challenge that the industry has is they’re very difficult to install.

Dry shake hardeners are applied in two portions, and there’s some work that needs to be done in-between. And one of the significant challenges of this application is that it all takes place in a very time-critical period. All the steps are time-critical, and it can be very easy to miss that perfect window of opportunity.

There are just so many variables that could be happening with the concrete and with the weather. And if workers start to have trouble with it, sometimes they just can’t get a full specified amount of the dry shake applied to the concrete.

John: That’s exactly the challenge that the contractor Graham Construction faced when they were building a new pea protein plant in Manitoba. This is a massive facility with large slab pours, and they were trying to get that shake-on hardener down in that little window of opportunity. And they lost the first slab.

They eventually changed to Hard-Cem to get away from the challenge of that little window of opportunity for properly applying the shake-on.

re there other challenges that come with using dry shake hardeners?

Jeff: Another challenge that we see is that this work normally comes up fairly late in the day when workers have been at it for many hours and they’re just getting fatigued. This is a lot to put on them at the end of the day.

Another challenge that we see is that the dry shakes are very sensitive to bleed water. If there’s too much bleed water coming out when you apply the dry shake and you work that water back in, the surface will become weaker and is likely to delaminate. If you have a low-bleeding concrete, perhaps something with a lot of fly ash, there’s just not enough water there to really work it in properly. The concrete sets up too quickly.

There can also be challenges with wind. And of course, it’s very important not to use dry shakes with air-entrained concrete because the power troweling needed to really work them in properly leaves a high risk of delaminating the concrete surface. So there are many challenges to dry shake products that people might face.

There are also some products that professionals apply post-construction, right? What about those?

John: Yes, I think if you’re in Western Canada, where I live, many of these products use silicate as the base for their formulas.

Jeff: Right. When we’re describing liquid hardeners (which are sometimes called liquid densifiers), these are all some sort of silicate-based product. They work by penetrating into the concrete and reacting with the calcium hydroxide there, which is a by-product of cement hydration. That reaction turns into what is called calcium silicate hydrate gel, which is the normal hydration product of cement. It’s what gives the cement paste its strength and what gives concrete its properties. So this reaction pathway is really quite similar to the reactions you get from fly ash or slag or other supplementary cementitious materials.

That introduces some challenges in and of itself. Some suppliers of these products recommend limiting the amount of fly ash or slag you’re using in your concrete. That’s not always possible or desirable for many other reasons. Or they may recommend delaying the application for at least 28 days to allow the concrete to come up to its specified strength first so that the silicate is not competing with the other cementing materials.

Does their application work effectively?

Jeff: While they are often used or specified specifically to increase the abrasion resistance of the concrete as placed, that’s not really what they’re intended to do.

They function by slightly increasing the amount of cement paste on the surface. But cement paste is the weakest and most vulnerable phase to abrasion. Having a little bit more doesn’t significantly move the dial on the abrasion resistance of that concrete.

Now, liquid hardeners do serve an important purpose. If a contractor does have a slab that has had some challenges when they’re placing it, the surface might be poorly hydrated or weak or might have dried out too early. These products can help strengthen that surface as a remediation measure.

But they’re not really an appropriate material to specify as an abrasion-resistant material for concrete that’s been otherwise properly placed and finished.

re there other solutions that have been used to increase concrete abrasion resistance?

Jeff: Another common solution is high-strength concrete.

And why not just use stronger concrete? You get better abrasion resistance. And normally, this approach would be just using a mix that has more cement. You could use more fly ash or slag or maybe silica fume to really get that strength up and keep that water-cement ratio down real low. The concrete gets stronger, and the abrasion resistance is better. And this generally does work.

But there are some limitations.

Now, the research shows that when you double the compressive strength of concrete, you can roughly double the concrete’s abrasion resistance. And there is research and literature on this.

But there can also be some consequences. Any time you are using a stronger mix, especially with anything that has more cement paste, you’re getting more hydration. That generates more heat in your concrete. More paste means more shrinkage. More shrinkage normally means more cracking. And if you’re pouring a slab, you also now get more curling, so your floors just don’t stay as flat. And curling can result in a lot of damage and wear at the joints.

All of these things are actually really bad. They target some of the core properties that a facility owner expects of their floor. An owner wants more than just good abrasion resistance. They want their floor to perform in many other ways.

And as an added bonus, using high-paste strong mixes comes with a cost premium. Because you are using so much more cement in the concrete, the carbon footprint of that concrete can go up quite significantly.

So most popular concrete abrasion-increasing efforts don’t seem to work as well as expected. Is there a better way to get that abrasion resistance?

John: Adding Hard-Cem into concrete at the batch plant! Hard-Cem lives in that concrete paste, and that’s how it works. It increases the resistance to abrasion and erosion that way. It’s easy to apply. There are no negative effects on your plastic or your hardened concrete. It’s fully compatible and used often with air-entrained concrete, so no longer do you have to specify products like this just for indoor use. You can now use it outdoors. And it can be used in horizontal and vertical slabs, behind formwork, in precast, and in shotcrete. There’s a huge opportunity for this product to be used often in mining applications as well.

And Jeff very clearly articulated the difficulty in applying the shake-on hardeners. So no longer do the jobsites have to take all this into consideration. Basically, they can just order Hard-Cem when they order their concrete. And there’s no harmful dust exposure.

Hard-Cem’s been used for 18 years now for over 7 million m2 (80 million ft2) in all kinds of applications. And many of the top-producing concrete companies have branded their own durability concrete using the Hard-Cem admixture.

Once concrete finishers get to use this, they start to ask for it by name because it just makes their job that much easier.

It sounds like Hard-Cem could be a much more effective solution. But how well does it perform? We’ll look into that in more detail in Part 2 of this interview series.

The post Concrete Abrasion Resistance: The Bad, the Good, and the Better (Interview Part 1) appeared first on Kryton.

Concrete Hardening with Hard-Cem®: Frequently Asked Questions

Concrete Hardening with Hard-Cem®: Frequently Asked Questions

No matter where you are in the construction industry, you want the structures you work with to last. After all, no one likes to hear that their work failed to live up to expectations. And the expectations for long-lived structures have only grown, increasing as the concern for sustainability and climate change rise. There’s also now more demand for environmentally friendly structures that can resist harsher climates. In short, now more than ever, you’re looking for ways to keep your structures standing for as long as possible and to help them survive the wear and tear of weather and everyday activity.

In your search for the right solution to this, you may have come across our integral hardening admixture, Hard-Cem. Known widely to be a great solution for warehouse durability (and more), it’s been applied to over 7 million m2 (80 million ft2) of concrete across Canada.

But what makes it so popular? And why should you consider it for your future projects? These frequently asked questions and more have been given a great deal of thought in a number of our other articles. But to make sure you get all your answers in one place, we’ve decided to respond to these questions in an easy-to-read guide here.

So, What Is Hard-Cem Exactly?

As we briefly touched on earlier, Hard-Cem is an integral hardening admixture meant to make concrete more durable against abrasion and erosion. In fact, it’s the only one of its kind on the market currently!

Other concrete hardening solutions typically come in the form of dry shakes, liquid hardeners, or other conventional forms. However, they can also come with application concerns.

For one, dry shake products usually have a complicated application process, so there is a higher risk of applying them incorrectly. And because these products often come with toxic silica dust, workers are more likely to get exposed to that material and develop health problems.

Liquid hardeners, on the other hand, while safer and less complicated to use, are just not that effective. They’re designed to reduce dust from weak, improperly finished or fast-drying concrete slabs. They aren’t and shouldn’t be expected to increase concrete hardness to prevent abrasion or erosion.

And both dry shakes and liquid hardeners require time-consuming manual labor, which often requires expensive equipment.

Hard-Cem, however, is free of all these concerns! Because it’s an admixture, it just needs to be added to your concrete mix. And that’s it! It only has one step, so there’s no risk of applying it incorrectly. Hard-Cem also does not expose workers to silica dust, so it helps make jobsites safer. As a result, with Hard-Cem, you get an easier and safer way to create concrete that is harder and better able to resist abrasive and erosive forces.

How Does It Help with Concrete Hardening?

To help with concrete hardening, Hard-Cem is first added into the concrete mix. From there, it disperses throughout the mix, allowing hard particles to get embedded into the cement paste, increasing the hardness of the entire concrete slab. In turn, the cement paste wears more slowly, which reduces material loss that would normally expose the underlying aggregates and make the slab uneven and less functional.

All of which helps double the wear life of the concrete and increase its resistance to abrasion and erosion. And that remains a permanent, life-long feature for the concrete as Hard-Cem becomes a fundamental part of the concrete mix.

Will It Increase Concrete Performance?

Outside of extending your concrete’s wear life and raising your concrete’s resistance to abrasion and erosion, Hard-Cem can also increase your concrete’s chipping resistance. In short, it increases your concrete’s performance in terms of durability against physical wear and tear.

In fact, Hard-Cem is capable of doing this for both regular concrete slabs and concrete joints! However, it’s important to note that if you’re expecting severe wear on your concrete joints to the point that joint-armoring technologies are required, Hard-Cem is not meant to be a replacement for that technology specifically.

How Does Hard-Cem Increase Concrete Durability without Increasing Cement Content?

The fact that Hard-Cem doesn’t increase cement content might seem surprising at first considering it’s common to increase the cement content of your concrete to boost its durability. But keep in mind that Hard-Cem is an additive that strengthens and reinforces cement paste.

A good example for how that works is to think of additives that can be used in tire manufacturing. You’re still using the same amount of rubber, but the tires themselves can be manufactured to be more durable and abrasion-resistant.

Hard-Cem works in a similar way. It’s acting directly in the cement paste to reduce the rate of wear loss. So even though the bulk concrete still has the same or similar compressive strength and properties with Hard-Cem, the addition of Hard-Cem will still help reduce the wear of concrete when it is subject to abrasive and erosive forces. And it does that without the need to add more Portland cement to your concrete mix, allowing you to strengthen it and maintain lower carbon emissions.

How Is It Added to the Concrete?

Hard-Cem is added right into a concrete truck at the batch plant through your local concrete provider. There are no extra steps, and it ensures Hard-Cem is properly added to your mix before you start pouring your concrete. Hard-Cem is available in easy-to-use mixer-ready bags or bulk silo deliveries for larger jobs.

What Projects Can It Be Used For?

It can be used in any project of yours that needs a strong resistance to abrasion and erosion. That typically applies to warehouses. But there are so many more worthwhile applications!

Other projects that often get the most benefit out of Hard-Cem include the following:

Industrial service and repair baysHighway pavements and intersectionsBridge decksRunwaysParking structures, ramps, and apronsSkate parksTunnelsShaftsProcess buildings for mining, oil, and gas industriesUtility and maintenance buildingsLivestock housingStorage shedsTractor garagesDamsSluiceways, spillways, and drainage conduitsStilling basinsCulverts and precast pipesCanalsBlocks and pavers

Is Hard-Cem Compatible with Supplementary Cementitious Materials?

Yes, Hard-Cem has been successfully applied in a number of projects that use supplementary cementitious materials (SCMs), such as fly ash, ground-granulated blast-furnace slag, and silica fume.

Is It Compatible with Air-Entrained Concrete?

Also, yes! Hard-Cem is fully compatible with air-entrained concrete. Hard-Cem is not harmful to the air-void system. And air-entrained concrete treated with Hard-Cem remains highly durable to freeze-thaw cycles and salt scaling.

Is There Anything It Isn’t Compatible With?

In general, Hard-Cem is a highly versatile admixture! In addition to being compatible with SCMs and air-entrained concrete, it can be used for a wide variety of concrete placements whether they’re horizontal, vertical, or inclined.

Even its application can be versatile. Hard-Cem works with ready-mix, shotcrete, and precast concrete applications.

And no matter what mix you use, which concrete placement you go with, or how you apply it, Hard-Cem will not negatively impact your concrete’s water demand, workability, set time, strength development, or shrinkage. Instead, you’ll get the same concrete but with better durability.

Does Hard-Cem Change the Concrete’s Finishing Properties?

No, Hard-Cem does not change the finishing characteristics. In fact, finishers report a high level of satisfaction when working with the admixture. Moreover, Hard-Cem can be used with any specified finish.

Do You Have Any Other Resources That Can Teach Me More about Hard-Cem?

If you still have some questions about Hard-Cem or just want to satisfy a more personal curiosity in our novel concrete hardener, we have plenty of digital resources just for you:

Articles“The Top 4 Types of Smart Concrete Technologies to Boost Concrete Construction”“A Study in Durable Design: Creating the Award-Winning Metro Skate Park”“Hard-Cem: It’s Not Just for Warehouse Floors”“Why Hard-Cem Shotcrete Should Be Your Solution for Durable Concrete”“Liquid Hardeners vs Hard-Cem: Which Is Better for Concrete Durability?”“Lower Your Concrete Carbon Footprint with These 4 Innovative Methods”“Silica Dust: The Dangers and How You Can Mitigate Them”“Convert Your Concrete Slab from a Maintenance Liability to an Asset”


Case StudiesVancouver Convention CentreBear Creek HydroBrandt Tractor Ltd. warehouseAn Abbotsford residential workshopAshbridges Bay Skate Park


Educational ContentWebinar on integral concrete hardening for wear-resistant concreteHanley Wood University’s course on our integral hardening admixture for wear-resistant concreteConstruction Canada’s demo-cast recording on Hard-Cem

If I’ve Already Decided to Add Hard-Cem to My Project, Where Would I Get It?

We offer Hard-Cem through concrete providers around the world. So if you’d like to add Hard-Cem to your project, get in touch with your local provider. You can also check out our website for a list of contacts who could help you with your Hard-Cem needs.

The post Concrete Hardening with Hard-Cem®: Frequently Asked Questions appeared first on Kryton.

Did you miss our previous article…
https://cedarparkconcrete.org/?p=281

Building Artificial Reefs: What to Expect

Building Artificial Reefs: What to Expect

Lately, there’s been an increase in interest over the well-being of coral reefs. These marine habitats represent an estimated $2.7 trillion in ecosystem service value and support around 25% of all marine life after all. But we have already lost 50% of the world’s reefs at this point. And there appears to have been no specific global funding to help develop the protection and restoration of these reefs in the past.

Recognizing this, a coalition of partners from the 75th session of the United Nations General Assembly created the Global Fund for Coral Reefs. With this fund, they hope to raise and invest $500 million (USD) to support programs that will increase the resilience of coral reefs.

That means you may soon see more construction requests for artificial reefs. These sorts of reefs are manufactured constructs designed to promote the growth of coral reefs and provide marine life with shelter. It’s a great way to secure a profitable tender and give back to the environment all at the same time.

But if you do decide to take on an artificial reef project, what can you expect?
You May See a Wide Variety of Structural Requests

Over the years, the innovation for building artificial reefs has only increased. People from all over the world have their own ideas on how to build reefs effectively. So when you do encounter such a project, you might find some unique structural requests. Here are just some of the more well-known ones you might end up with.

They May Be Complex Like a Habitat Skirt

If you win a bid for an artificial reef construction project from a governmental authority, your work may be fairly large and complex.

For instance, back in 2008, the Vancouver Convention Centre used governmental funds to include a habitat skirt worth $8.3 million. The first of its kind at the time, this project used 362 precast concrete slats. They were fit into 76 frames and arranged to look like a large five-tiered staircase. That extended the center’s shoreline by 477 m (1,564.96 ft) and added 6,122 m2 (65,896.66 ft2) of marine habitat surface area.

That is no easy feat for a project that had never been done before! As one of the University of British Columbia’s blogs notes, this amount of space is equivalent to “the length of five Canadian football fields and the floor space of the entire White House.”

It’s also not the only government project thinking big. Further south, down in the United States of America (USA), in San Diego, the port there has started to install a sea wall. Designed to protect the edges of Harbor Island, the wall is expected to help restore the island’s marine ecosystem.

It makes use of a structure that consists of the Coastalock system, which interlocks hollow concrete units to create habitats for oysters, sea stars, algae, and a variety of other marine wildlife.

The port hopes to use 72 of the 3.5-tonne modules of this system to replace the island’s current riprap.

With those two projects in mind, you can see that certain artificial reef projects will involve a decent amount of construction material, some intricate design input, and a keen contractor eye to keep everything working smoothly.

Or They May Be a Smaller Affair Using Reef Balls or Cubes

Not every artificial reef project is so extensive of course. There are plenty of people around the world who go to the Reef Ball Foundation and ARC Marine to install concrete structures in waters. These structures may be circular or more cube-like in shape, and they can range in size. Some may be as small as 0.3 m (1 ft) or so or as big as 1.5 m (5 ft) or more. In either case, the structures come with holes and various surface textures to offer marine wildlife places to rest and hide from predators that still look and feel like natural reefs.

They aren’t always interlocked and don’t need any additional design work. So it’s easier for people to order these structures from the organizations making them or from contractors for these organizations and have either group deploy the structures into the water.

It also makes it a less complex project on your end if you win a contracting tender for an organization that already handles this sort of work.

It May Even Involve Just Deploying Structures or Materials in a Specific Part of a Marine Area

Sometimes building artificial reefs is all about the structures or materials and nothing else.

In some cases, that might mean placing defunct ships, oil rigs, or some other old, large structure into open waters.

In other cases, it might mean doing the same but with defunct subway cars! Running with that last idea, the State of Delaware in the USA has been pushing old New York City Redbird subway train cars into the open waters off the coast of Slaughter Beach since 1996. However, to make sure these cars are marine-friendly, they strip them of any glass, seats, signs, wheels, and petroleum products before dumping them. That way, water can flow in and out of the old vehicles, allowing larvae from sea invertebrates to safely drift in and gain shelter, which in turn, lets them flourish and feed other marine animals.

An even simpler version of this project that you might encounter could be a request to place concrete pipes or steel beams on the ocean floor. For instance, further south from Delaware, in Pinellas County, Florida, such projects have helped to create around 42 reefs.
A wide array of construction materials, including wood and steel, are laid out on the ground of a worksite.

These Requests Can’t Just Be Fulfilled with Any Material, However

While some projects will already have a specific material in mind like those using the reef balls or reef cubes, there will be others with more leeway. And when that happens, you’ll need to carefully consider what material you use.

Think of it as building a home of sorts. You wouldn’t just use or reuse any old material for a person’s home. It could end up being structurally unsound or even toxic for the person who chooses to live there.

The same can be said for building artificial reefs. If you choose to build reefs by reusing waste like old tires or polyvinyl chloride, you’ll soon discover that neither material is the right kind for marine wildlife to call home. They’re usually too small, for one. So organisms needed to create reefs can’t grow on them. And they’re also very unstable. The waves can carry them to any part of the ocean floor easily, which is not appealing to marine wildlife as reefs are meant to be naturally anchored to the seabed. What’s worse though is that they can both release toxic chemicals, transforming their potential to be homes into a danger zone for any aquatic creature nearby.

So, what can you use instead?

Concrete Is Often the Preferred Material for Building Artificial Reefs

You might have guessed it already considering how often previous projects have used it already. But concrete really is one of the more preferred materials for building artificial reefs. And there are a number of reasons why that’s the case.

According to the New Heaven Reef Conservation Program, some of those reasons have everything to do with the composition and versatility of concrete.

Much like reefs, the composition of concrete makes use of the chemical compound calcium carbonate. Reefs get it naturally through coralline red algae, which form a calcareous skeleton that supports coral reefs by cementing them together. Meanwhile, concrete often gets the compound through common building materials like limestone. But regardless of how they get the compound, that makes concrete at least seem more natural to marine wildlife.

That’s not all that gives its composition such an appeal. Concrete is also innately strong and heavy enough to remain anchored at the bottom of any waters it’s placed in and lasts for a long time, giving marine wildlife a secure shelter for protection or habitation.

But what about concrete versatility?

Well, because concrete can be constructed into almost any shape and size, it gives you an opportunity to give an artificial reef any number of nooks and crannies that fishes and other aquatic wildlife like to hide in.

However, There Are a Few Other Materials You Could Work With

With that said, concrete isn’t the only material that people have gone for when building artificial reefs. They have also gone with the following materials using unique methods:

Electrified steelUsing biorock technology, ecologists in Indonesia have been able to form artificial reefs with electrically charged steel structures. Using a low-voltage current to charge the steel, the ecologists create an interaction between the electricity and the minerals in the seawater. That reaction causes limestone to grow on the charged steel. That growth eventually solidifies, forming reefs much quicker than they naturally would otherwise. This method has also shown to heal injured coral up to 20 times faster than other methods.

Steel spiders Even without electricity, steel remains a good material for building artificial reefs. For instance, people off the coast of an Indonesian island have been attaching parts of coral reefs to rust-protected reinforcing steel structures known as steel spiders. Over time, this process increased the amount of coral on the steel spiders by over 60%. At least 42 different coral species were growing on the steel spiders because of this. And in the rubble surrounding the steel spiders, people found at least 58 species.

Glass bottles in concrete While this method still uses concrete, the main focus is the glass bottles embedded in the concrete. As the concrete keeps the glass bottles anchored securely, the bottles themselves act as a way to transplant broken or nursery corals to attract marine life to the area and eventually create a reef and feeding hub for fish.
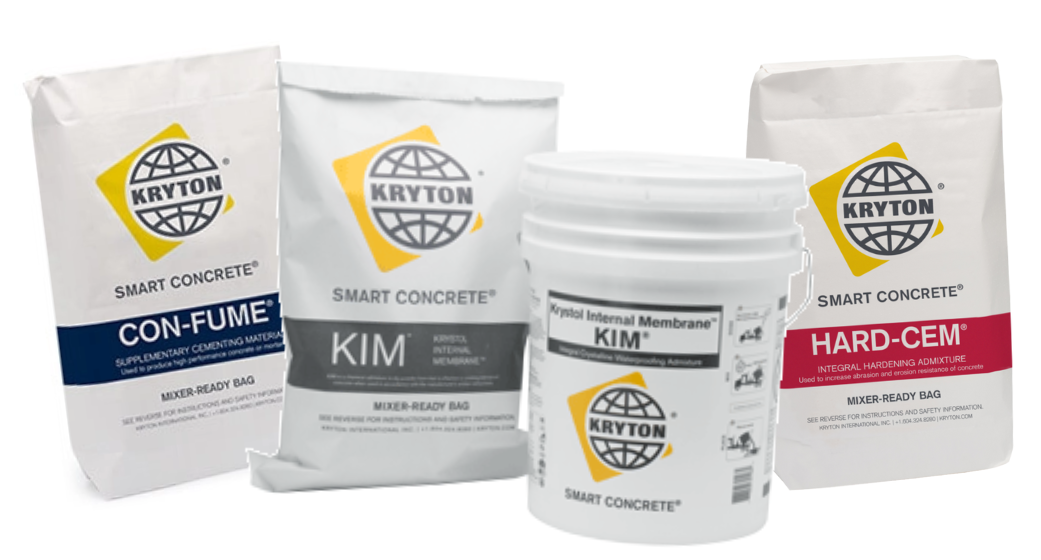
Kryton's Con-Fume, KIM, and Hard-Cem solutions sit next to each other in their packaging against a white background.

If You Do Go with Concrete, Consider Increasing Its Durability

As you know by now, concrete has a lot going for it as a material for artificial reefs. So if you do choose to use it, you know you’re in good hands.

But like with anything, you want to make sure you’re using your chosen material as effectively as possible. Part of that means making sure the concrete for your reef lasts for as long as possible. After all, artificial reefs are meant to be a lasting solution to the loss of so many natural reefs worldwide. And they won’t last if they don’t remain a permanent fixture in the water.

There are plenty of solutions out there that can help you strengthen the life span of your artificial reef, however. So which should you go with?

Here are some good choices that you might want to consider first:

Con-Fume One major artificial reef organization in the USA, the Reef Ball Foundation, requires silica fume in the specs for their artificial reefs. So if you want to follow their design as a blueprint for your own artificial reef, you may want to apply our Con-Fume solution. It is a silica fume product made from pozzolanic material to produce high-performance concrete. It comes in ready-mix bags and meets ASTM and CSA standards for silica fume.

Hard-Cem If you happen to be placing your artificial reef project in waters with swift currents, you may want to add Hard-Cem to your concrete mix. With fast-flowing water, there’s a higher chance for debris to bump up against your reef structure, gradually eroding away its surface and even potentially causing cracks. That surface will likely weaken after some time, leaving it vulnerable to losing aggregate and cement binders to the fast-moving water. But with Hard-Cem, this possibility becomes less likely. As an integral hardener, Hard-Cem increases the abrasion and erosion resistance of concrete and doubles concrete wear life even under harsh conditions. So it is capable of giving your artificial reef the durability it needs to withstand the abrasive and erosive forces in the water.

Krystol Internal Membrane
™
(KIM Another issue that can threaten your artificial reef’s longevity is a sulfate attack. Sometimes caused by industrial water pollution or seawater, a sulfate attack can chemically change the reef’s cement, weakening its bond with the surrounding aggregate. That can then cause extensive cracking and wear, ruining the structural integrity of your reef. Luckily, KIM can safeguard your reef from such a situation. Using Krystol technology, it enables your concrete to react chemically to water, forming needle-shaped crystals that fill up its capillaries and micro-cracks. That ensures the sulfate in the water cannot get through your concrete and damage its structure. KIM was also one of the top-performing products at preventing the corrosion of steel reinforcement during a 10-year study in a marine environment by the University of Hawaii. Moreover, KIM is also NSF-certified as safe for potable water and has the Singapore Green Label, proving that it is non-toxic.

A shoal of fish swim past a vibrant artificial reef.

You’ll Soon Have an Artificial Reef Perfect for Clients and Marine Life

Knowing what to expect and what tools to consider now, you’ll be ready to create a marine-friendly artificial reef of your own in the future. Just keep in mind the potential scope, materials, and obstacles you might encounter, and you’ll have an artificial reef up in no time.

Download our e-book today to find out why the industry is moving away from surface-applied concrete hardeners.

The post Building Artificial Reefs: What to Expect appeared first on Kryton.
Interview: Optimizing Concrete Compressive Strength Monitoring for a Treatment Plant

Interview: Optimizing Concrete Compressive Strength Monitoring for a Treatment Plant

Treating about 80% of San Francisco’s water since 1952, the Southeast Treatment Plant has been a critical structure for sanitizing the wastewater of San Francisco. However, the plant has been around for years, and now, many of its facilities need an upgrade.

Knowing this, the San Francisco Public Utilities Commission has started modernizing the plant. Part of this transformation includes replacing the treatment plant’s headworks facility with a new one. That will ensure the treatment plant will be able to more effectively remove debris and grit from the water while meeting the current seismic standards.

To construct this more modern headworks facility, the San Francisco Public Utilities Commission has collaborated in a joint venture with The Walsh Group Ltd. and Sundt. And we are pleased to note that we are helping The Walsh Group Ltd. optimize their work in this venture with our Maturix Smart Concrete Sensors.

Our Maturix specialist, Kris Till, got to discuss this in a recent video interview that he conducted (which you can see here). And in this article, you’ll get to see that discussion along with some extra details on the topic.

Why don’t we get started by having you tell us who you are, who you work for, and what you’re building?

My name is Tanner Santo. I’m a superintendent for The Walsh Group here in San Francisco, California. We are building the new headworks for the Southeast Treatment Plant. It’s going to be up to a 300-million-gallon-per-day capacity in the wet season. We’re looking at probably a good two years of structural concrete, which will primarily be my focus.

What do you consider to be the most important factor when building a project like this?

I think one of the biggest things I look for as a superintendent is to maintain efficiency while also preserving quality. There are a lot of moving parts and challenging logistics on this project. And what we need to do is just get our crews into a rhythm.

So, why are you monitoring concrete in this project?

That’s actually a very good question. We’re doing a lot of vertical walls on this job. I think we have 300 to 400 different wall placements. And the big thing for us is that we cannot strip those forms until we reach a minimum compressive strength.

What would you have done in the past to monitor your concrete compressive strength?

So, in the past, in situations like this, we pour a wall, say on a Monday, and take a bunch of concrete cylinders. By Tuesday morning, they’re sent off to a lab. If I want early breaks to remove the formwork, I need to take extra cylinders.

The extra cylinders can be costly when you talk about hundreds of wall placements. So taking and breaking extra cylinders for every placement adds up very quickly.

What’s even more of a hassle is getting those break results. So if I put in a 30-foot-tall [9.14-meter-tall] concrete wall on a Monday, Tuesday morning, I’m waiting on a testing lab to give me early breaks back, and what I need them to tell me is that the concrete has reached a minimum strength. So in that morning time when I’m waiting for a break result or for the testing lab, I have a crew of guys who are basically not being efficient. They can’t strip the formwork yet.

nd what’s your current concrete monitoring process like now?

We put a few thermocouples with the Maturix Sensors into the wall at the time of placement, and thanks to the maturity curve that we’re able to calculate with the help of CEMEX, our concrete provider, we actually get a live readout of compressive strength. If we had never run this maturity curve for these sensors or monitored the live compressive strength with the sensors, I don’t think we ever would have realized how quickly we were getting concrete strength on this job.

It gives me a lot of temperature data as well. Had those sensors not been there, we wouldn’t have realized that we are working with a relatively hot mix. We now exercise some caution with some of those thicker placements that I don’t think we ever would have previously because we just wouldn’t have known what type of internal temperatures we were getting on this job. That information alone has been a big help as far as planning and scheduling goes.

It’s even so streamlined that I have notifications set up to my cell phone. I’m not waiting on a call from a testing lab. I’m not hounding a testing lab. I actually get a ding on my phone, but on this project, it’s a bit unique. It’s actually kind of in the middle of the night or the early, early morning when it tells me that a wall has reached 1,250 psi [8.62 MPa]. That way at 7 am, when the guys show up to work, we’re not waiting on anything. We immediately get to work taking the forms off. I know the wall has reached a compressive strength where it’s safe to do so. There’s really no second-guessing anything. And that helps with the logistics of cranes and organizing manpower.

Why did you specifically choose Maturix?

What made Maturix the number one choice was just the cost-effectiveness of it. A lot of the competitors have one-time-use sensors where you’re paying up around $100 a sensor and you embed it into the concrete. In every single pour, that’s $100 down the drain whereas Maturix technology is actually better because I don’t have to go around and capture the data with Bluetooth. It’s all done over a cloud network. It’s sent directly to my phone like I mentioned. I don’t have to pay someone to go around and collect data via Bluetooth. So in reality, I’m paying less for a better product.

So it seems Maturix offers cost-effective concrete compressive strength and temperature monitoring. It also documents everything related to this. Has that helped you with quality control procedures?

Yeah, definitely. It just basically organizes all our pours. I mean, I can go back to stuff I poured a month ago and see that Maturix records the exact time of placement.

What would you tell someone who is considering Maturix?

It’s streamlined. It’s easy. As far as cost-effective, it’s not even close compared to the competitors out there with the one-time-use sensors. And the labor you save in collecting the data is also a huge cost saving as well. So we’ve just been very happy with what these sensors have provided for us here.

Thank you so much for taking the time to talk with us. We really appreciate it.

No problem. You guys are helping us out a lot on this project. We got a good thing going here, so I’m happy to help out.

*Banner photo by Pi.1415926535, CC BY-SA 4.0 , via Wikimedia Commons

The post Interview: Optimizing Concrete Compressive Strength Monitoring for a Treatment Plant appeared first on Kryton.
Did you miss our previous article…
https://cedarparkconcrete.org/?p=270

What Is the Maturity Method?

What Is the Maturity Method?

Over the past year or so, you’ve gotten to learn about our latest product, the Maturix Smart Concrete Sensors, and the benefits they offer. Throughout it all, you’ve probably heard us mention the maturity method once or twice. It’s a concept that our wireless concrete sensors leverage to improve the process of concrete monitoring. But what is it exactly?

To answer that, we’ve brought on Marina Salvador, the instructional designer for the creator of the Maturix Sensors, Sensohive Technologies ApS. Read on to see her define the maturity method these sensors use, what the steps involved in this method are, and what you can do to learn more.

The Definition 

The maturity method is a non-destructive test method that can be used to estimate the early-age strength development of concrete. The main assumption of the maturity method is that if two samples of the same concrete mix have the same maturity, they will also have the same strengtheven if they were cured under different temperature conditions

Thanks to new technologies and smart maturity systems like Maturix, which uses wireless temperature sensors and cloud computing, the maturity method is now a fast and easy method to use for real-time strength estimation.

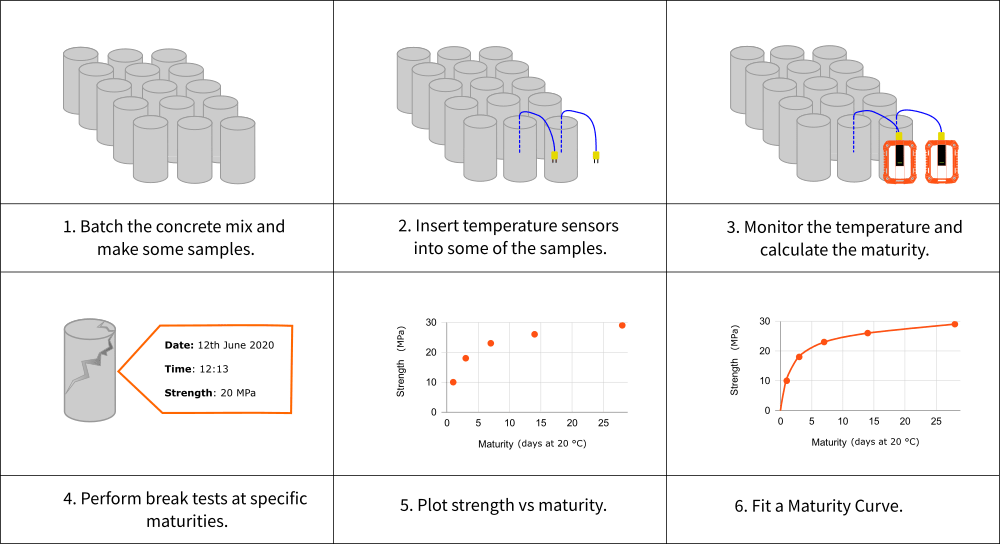
The maturity method has three main steps, which you can read more about below.

A diagram divided into six rectangles shows the six steps to calibrating maturity. These include batching the concrete mix and making some samples, inserting temperature sensors into some of the samples, monitoring the temperature and calculating the maturity, performing break tests at specific maturities, plotting strength versus maturity, and fitting a maturity curve.

Method Step 1: Make a Maturity Calibration

A maturity calibration determines the relationship between the maturity and strength development of a specific concrete mix.

To find this relationship, you make some samples with the concrete mixture that you will use in your project and instrument some of them with temperature sensors. The samples are then cured under the same conditions, and the temperature history is measured using the sensors. Then, you need to perform break tests of the samples at different test ages to determine their compressive strength. Once that is done, plot the strength data from the break tests and the maturity from the temperature history in a graph. Lastly, find the best-fitting curve through your data points, also known as the maturity curve.

Note: You can add the strength results and maturity values in Maturix, and the system will automatically plot the maturity curve.

A diagram is divided into three rectangles that describe the steps in estimating the in-place concrete strength. These include batching the same concrete mix as the one used in the lab tests, inserting temperature sensors into your structure to monitor the maturity of your concrete, and estimating the concrete strength with a maturity curve.

Method Step 2: Estimate the In-Place Strength

Once you have performed a maturity calibration for your concrete mixture, you can estimate the in-place concrete strength by placing temperature sensors inside your structure. These will calculate the maturity index in your concrete and relate it to a certain strength from the maturity curve.

Note: With Maturix, it is extremely easy to follow the strength development, as the software will display the results in real time, and these can be accessed remotely. Moreover, it is possible to set up alarms to get notified when the desired strength has been achieved.

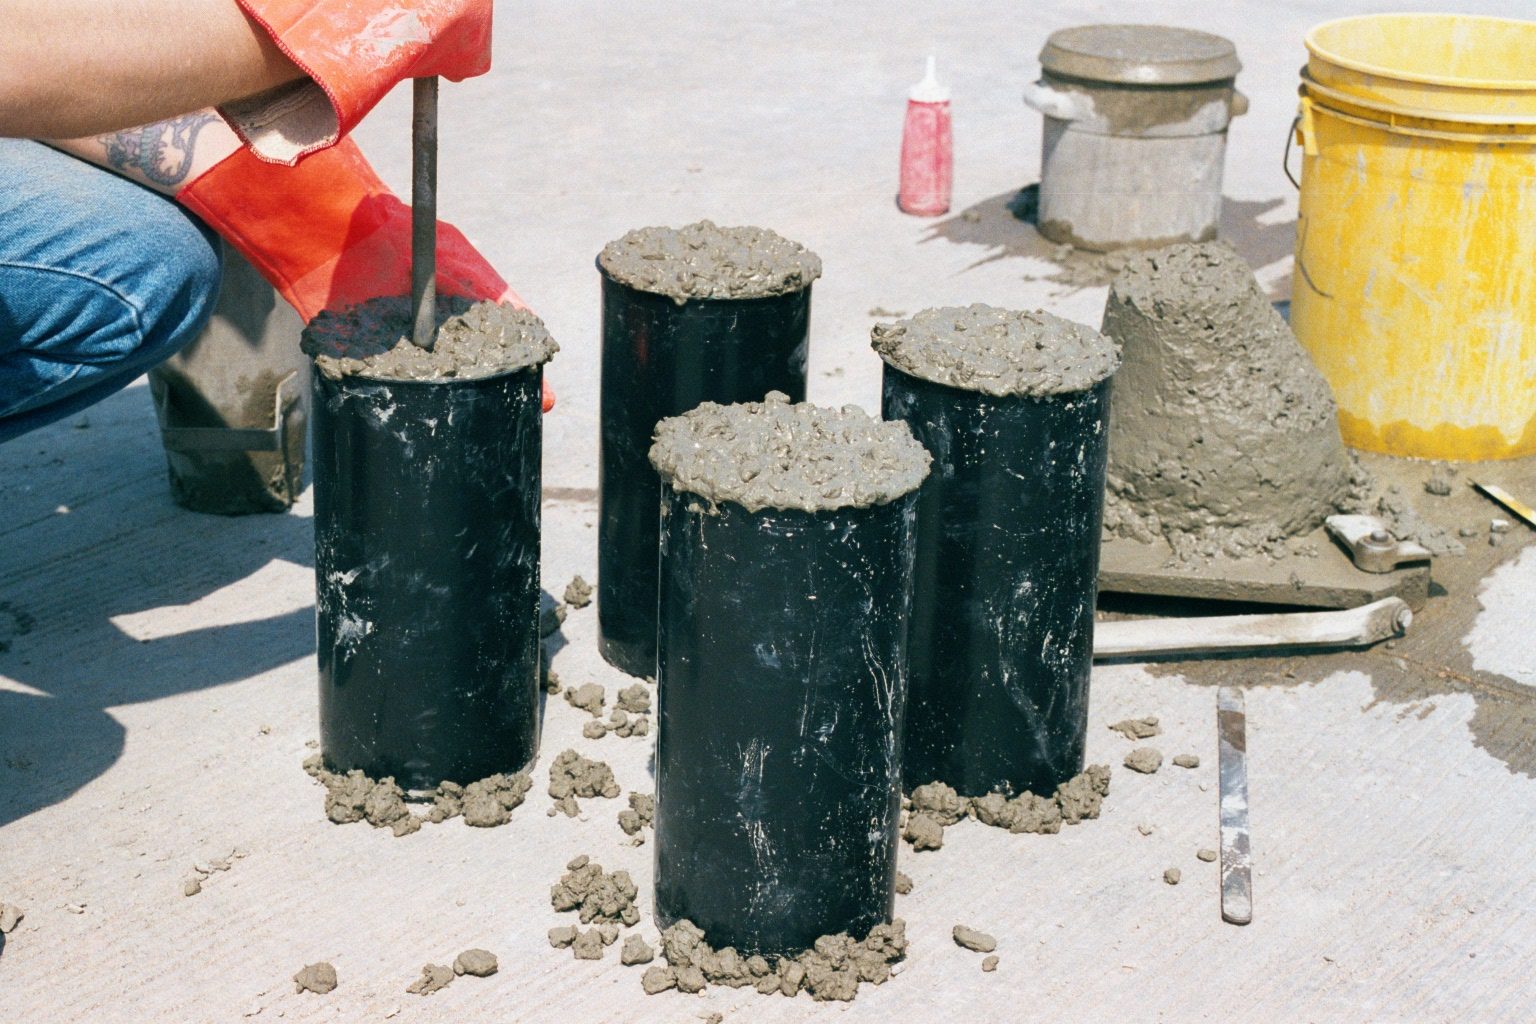
A construction worker is creating concrete samples to test.

Method Step 3: Validate the Maturity Calibration

Validating the calibration and maturity curve regularly is important because there might be small variations in materials, batching equipment, and conditions that might affect their accuracy.

To validate your maturity calibration, make some samples during the next batch and compare the strength estimated using the maturity method with the strength obtained from other testing methods.

ASTM C1074 strongly recommends not to perform critical operations without verification of the maturity calibration or without strength validation using other test methods.

A long bookcase full of colorful books curves away from the foreground in parallel with a black-brown railing.

Further Reading

To learn more about the three steps of the maturity method, we recommend you read these articles: “Maturity Calibration,” “Estimate In-place Strength with the Maturity Method,” and “Validating the Maturity Calibration.”

Convenient. Cost-Effective. Remote. Concrete monitoring with Maturix. Book a demo today!

The post What Is the Maturity Method? appeared first on Kryton.